PickPack Assistant is a module that allows you to automate the processes included in the management of orders for your clients. The possibilities it provides, combined with automatic actions, will significantly speed up the process of preparing the packages.
How to select the orders to be packed?
You can do it in two ways:
- By using a scanner. After you launch the module PickPack Assistant, the system will ask you to scan the order. The barcodes are available either on the printouts ‘Order list’, ‘Order card’, ‘Label’ (shipping code) or on the printout ‘Invoice’.
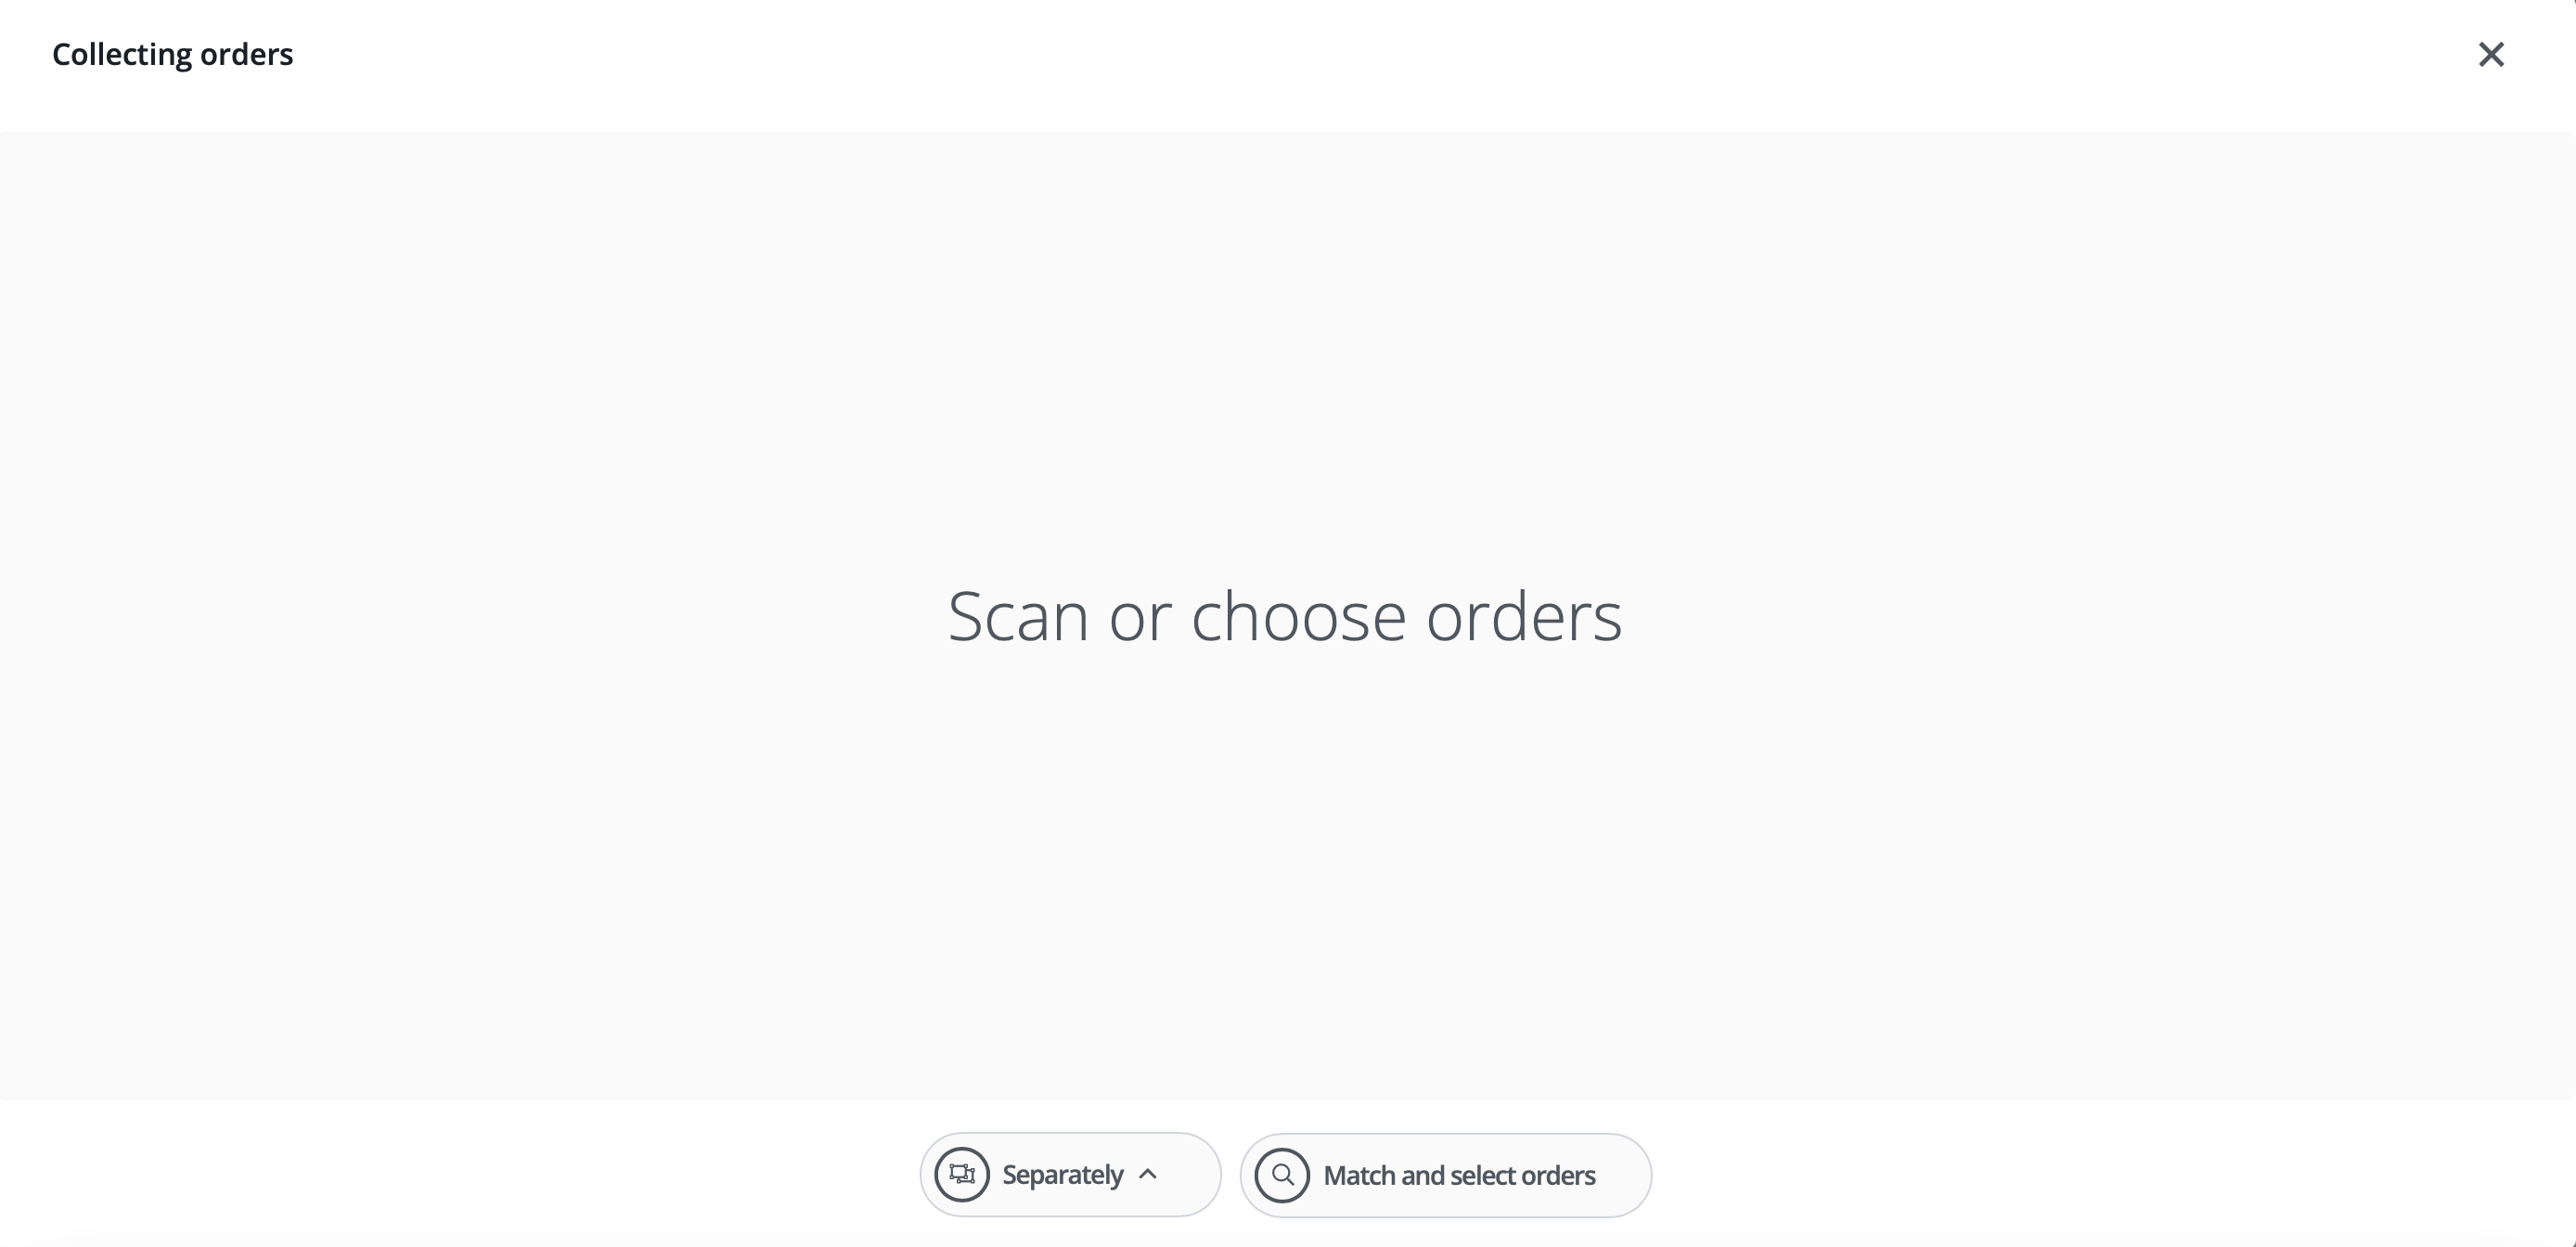
- By manually selecting the orders to be packed in the tab Orders → Order list (to make it easier, you can filter the orders by the relevant status, e.g. ‘For packing’), and then by launching the module PickPack Assistant.
What info is available in the PickPack Assistant view?
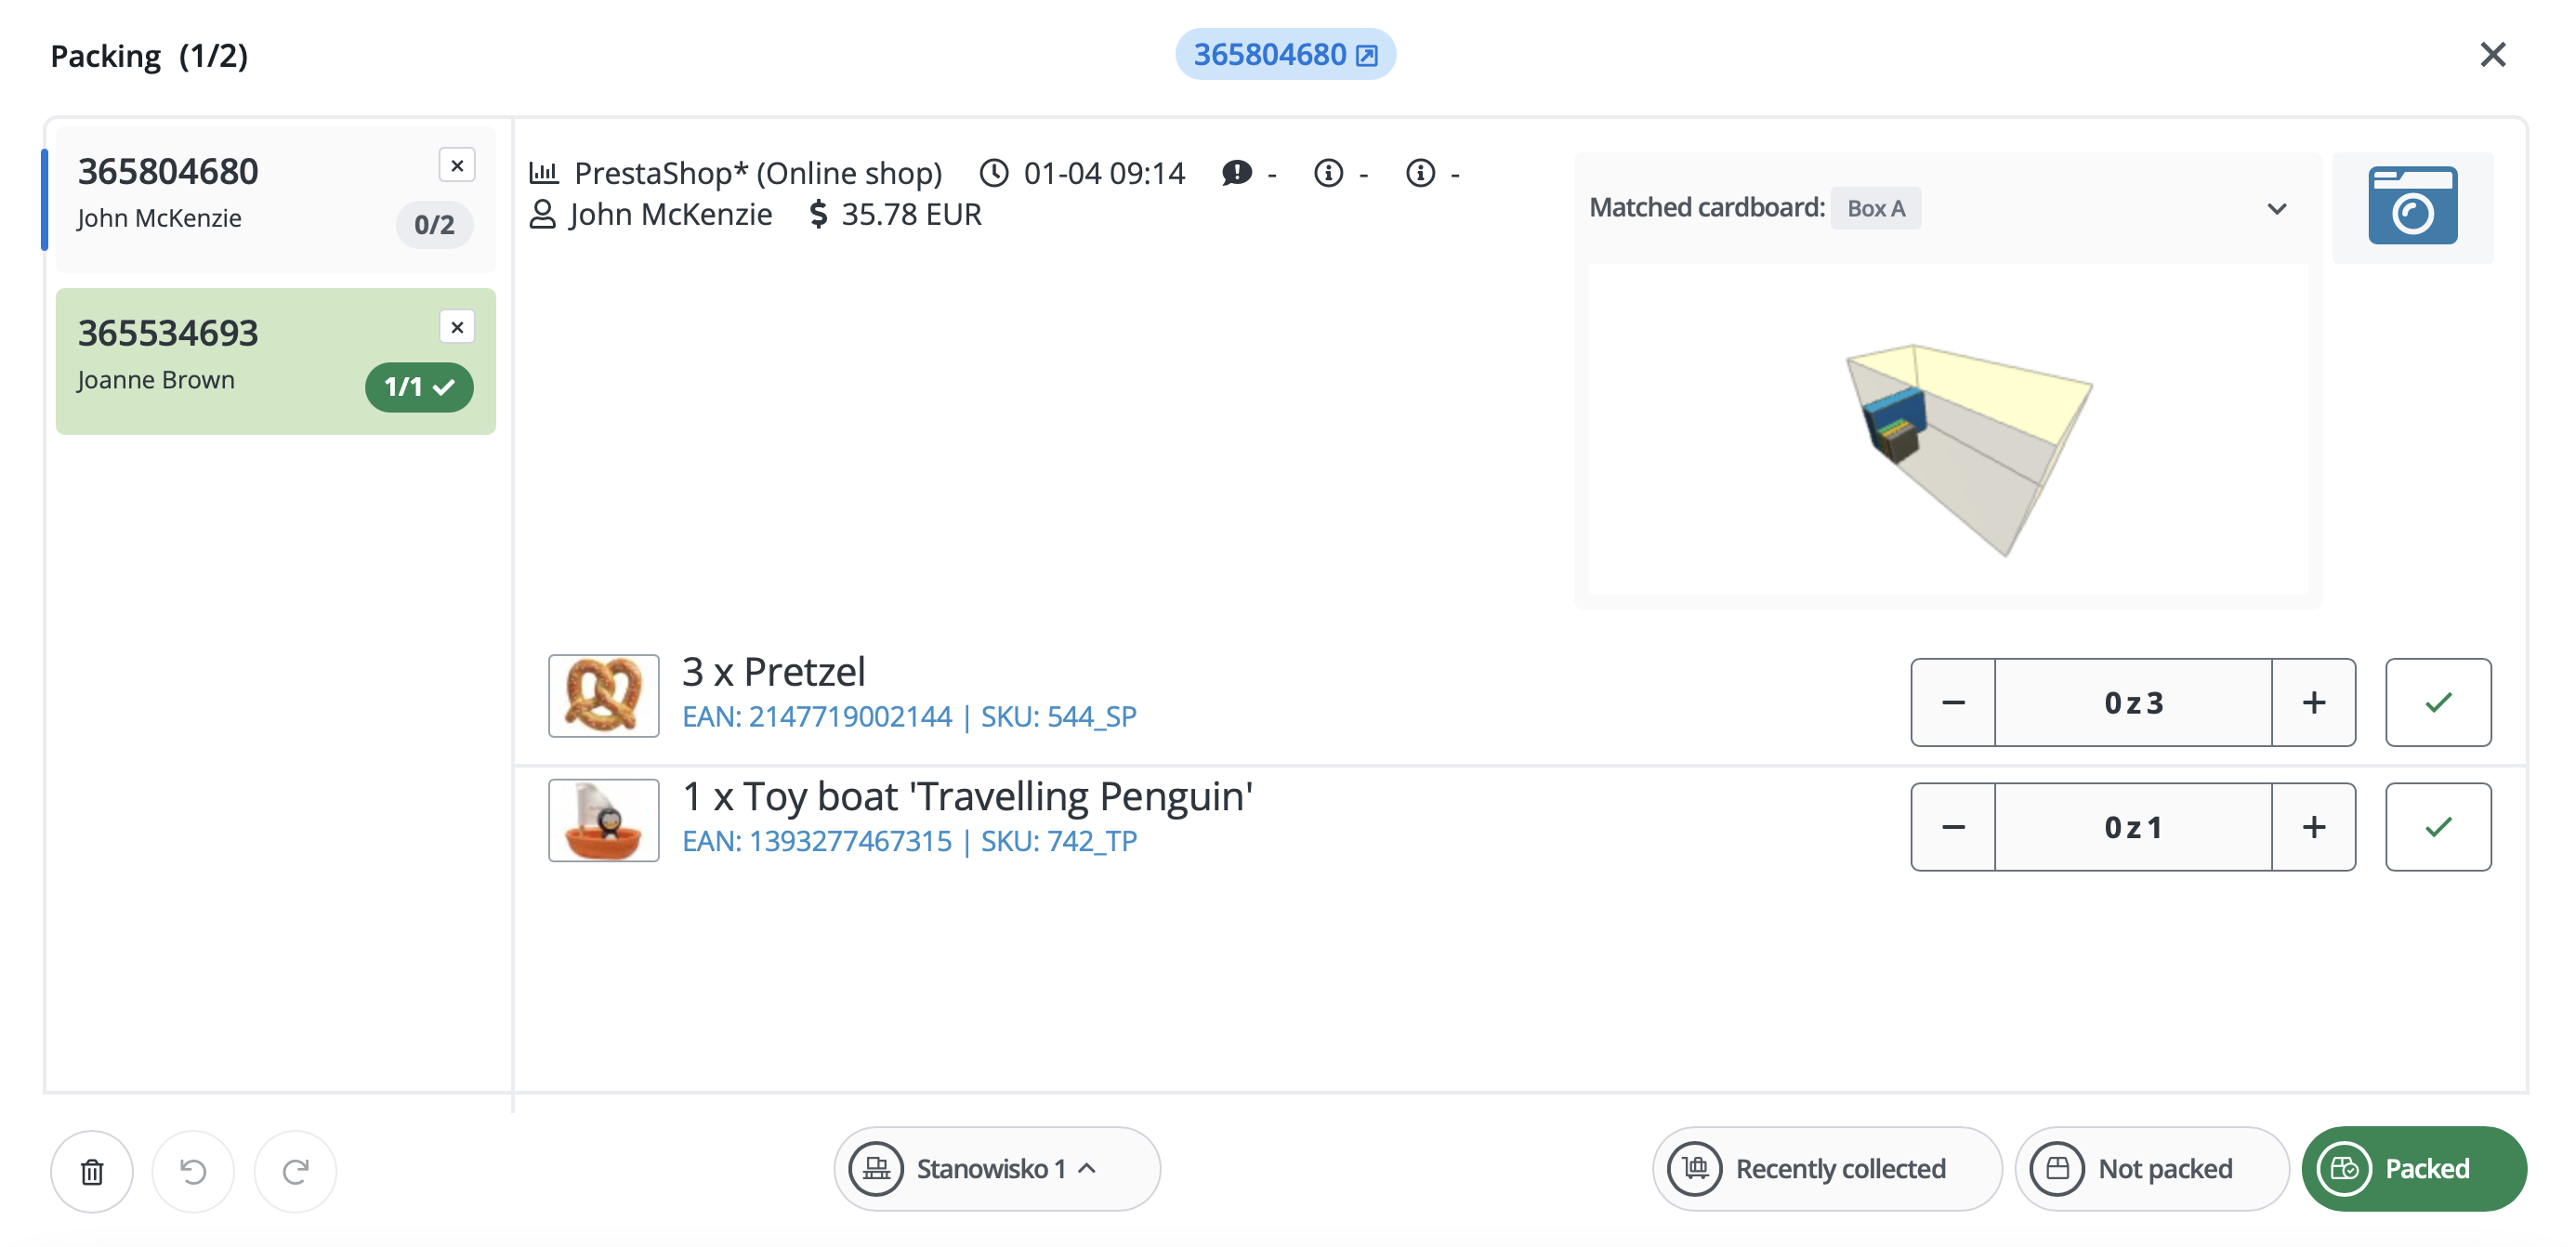
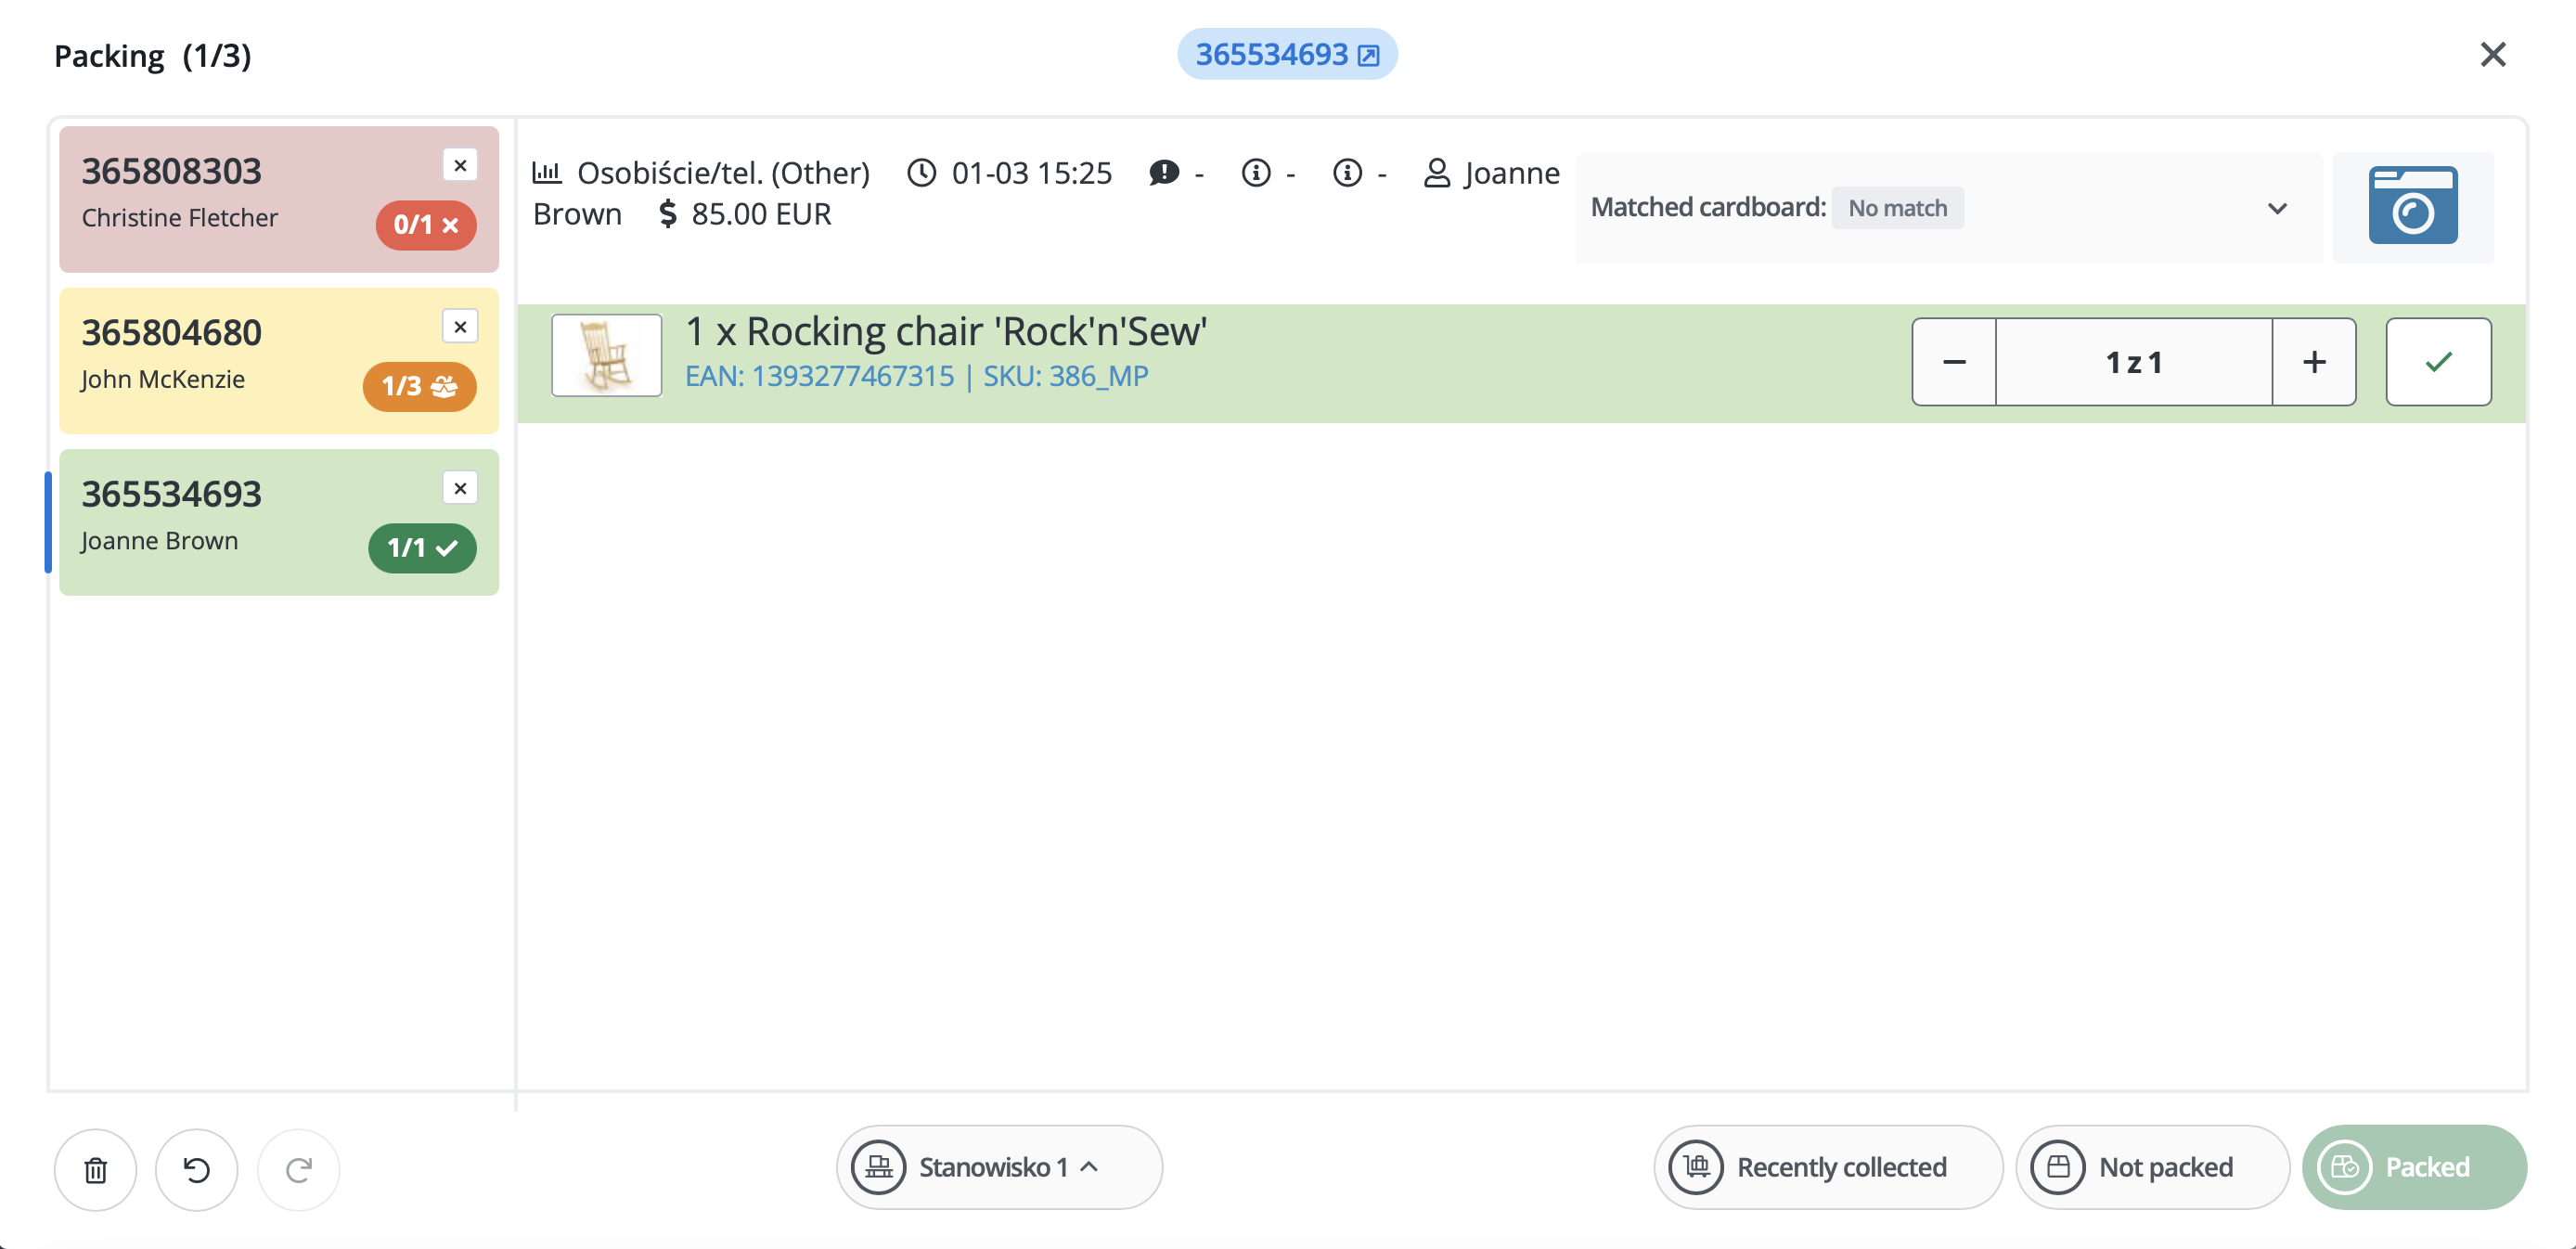
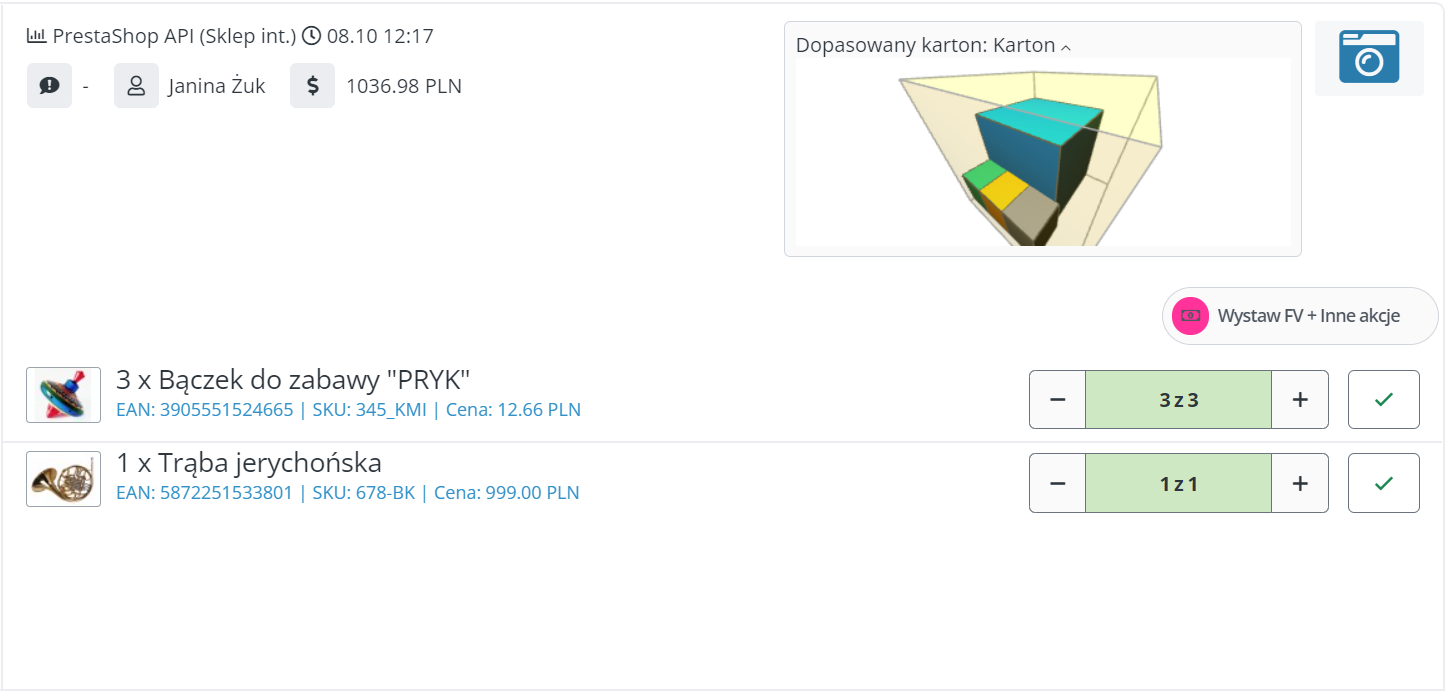
The PickPack Assistant view contains info regarding the orders that need to be packed.
In this view, the following areas are available:
- Orders tab – a list of orders selected for packing, visible on the left. This is where all scanned or manually selected orders are added. The already packed orders can be hidden with the button ‘Hide packed orders’. In the mobile version, this tab is moved to the top of the screen.
- Details of the order – at the top of the screen there is information regarding the selected order. The specific info that will be presented here can be configured in the tab: Order → Settings → Picking/Packing → Packing.
- Photo area – the button in the top right corner allows you to take a photo. After taking photos of the order, the camera icon is replaced with the proper picture of the order.
- Buttons for individual events – individual events can be assigned to automated actions and be evoked from the level of the packing view.
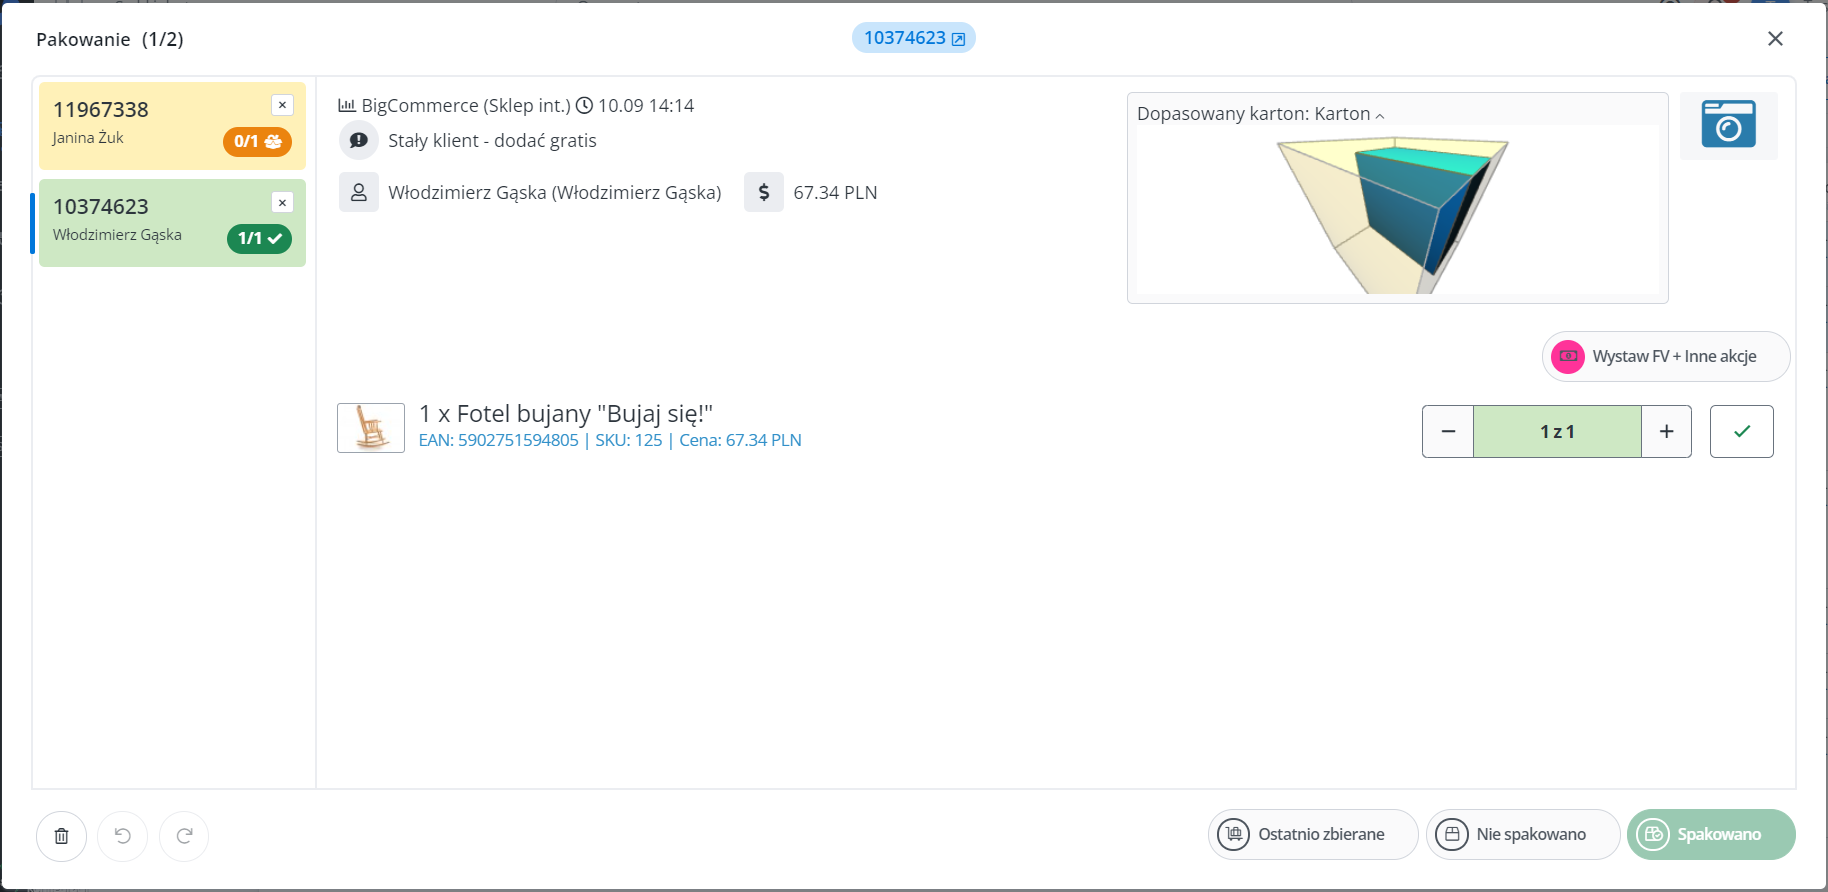
- Section for matching boxes – at this point the system can adjust the appropriate box for the selected order.
- Product details – in the central area of the screen, displayed is a list of products for packing for the selected order, along with additional information, e.g. thumbnail, product EAN, product SKU and product attributes. Each record has buttons ‘+’ and ‘-‘, which allow you to modify the number of products added to the order.
- Buttons at the bottom of the screen.
- Hide the packed orders – it’s useful if the list of orders to be packed is long and the user would like to only see their unpacked orders.
- Undo the operation / Redo the operation.
- Selection of the workstation where the order will be packed.
- Recently collected – opens the window with information regarding the the recently collected orders, ready for packing.
- Mark as unpacked – marks all products from the order as unpacked.
- Mark as packed – marks all products from the order as packed.
Visual and sound information
Depending on the stage of order packing, each position visible in the order tab will be displayed in one of the colours: white, yellow, red or green.
The order for which no product has been packed yet is marked white. The orders which are in the process of packing are marked yellow, and those which have been completed – green.
If, due to an error, more products get packed in an order than were supposed to be – the system will mark it red. Besides the visual clue, the system will inform you about the packing error also with a sound signal.
How to mark an order as packed?
The whole order will be marked as packed the moment when each product in the order has been packed. You can do it in the following ways:
- By marking each product in the order as packed. This can be done:
- Using a scanner – by scanning the EAN/SKU of the product, which will cause the system to mark a single item of the product in the open order as packed.
- Manually – by selecting, in the Packing assistant view, the button ‘+’ for each product from the order for the appropriate number of times.
- By using the button ‘Mark as packed’ and changing the status of all products in the order at once.
As a result, the whole order gets marked green, and the system can at that moment take a photo of the completed order – if such an option had been previously configured.
Collecting products
The system offers you the possibility to collect products by batch-picking, i.e. mass completion of all positions for multiple orders. This speeds up and facilitates the storage logistics, and by adding the division of the collected products into carts – it makes the process of finalizing the packing of packages more effective.

In terms of its logic, the view ‘Pick products’ resembles the view ‘Pack’. This functionality is responsible for mass collection of all products from selected orders, to enable you to quickly gather them in the storage. Therefore, this module is not equipped in such options as taking photos. Any other differences are a result of user’s configured preferences, available at: Orders → Settings → Picking/Packing → Picking.
The person collecting the orders can use the collecting assistant after launching it on a smartphone or tablet. It’s good to additionally equip the mobile devices in bluetooth code scanners. A compact scanner can be permanently attached to the phone, thus serving as a data collector. Meanwhile, a tablet can be attached to the cart of the person collecting items and it can be connected to a portable bluetooth scanner (e.g. worn on a finger).
The recommended methods of collecting items:
- With the help of collecting assistant (if an employee is collecting items for another employee, responsible for packing them).
- By using a printout with barcodes.
- By using a printout with a product list – enables you to collect items for multiple orders at once, i.e. batch picking. It is recommended if the same products frequently appear in many different orders.
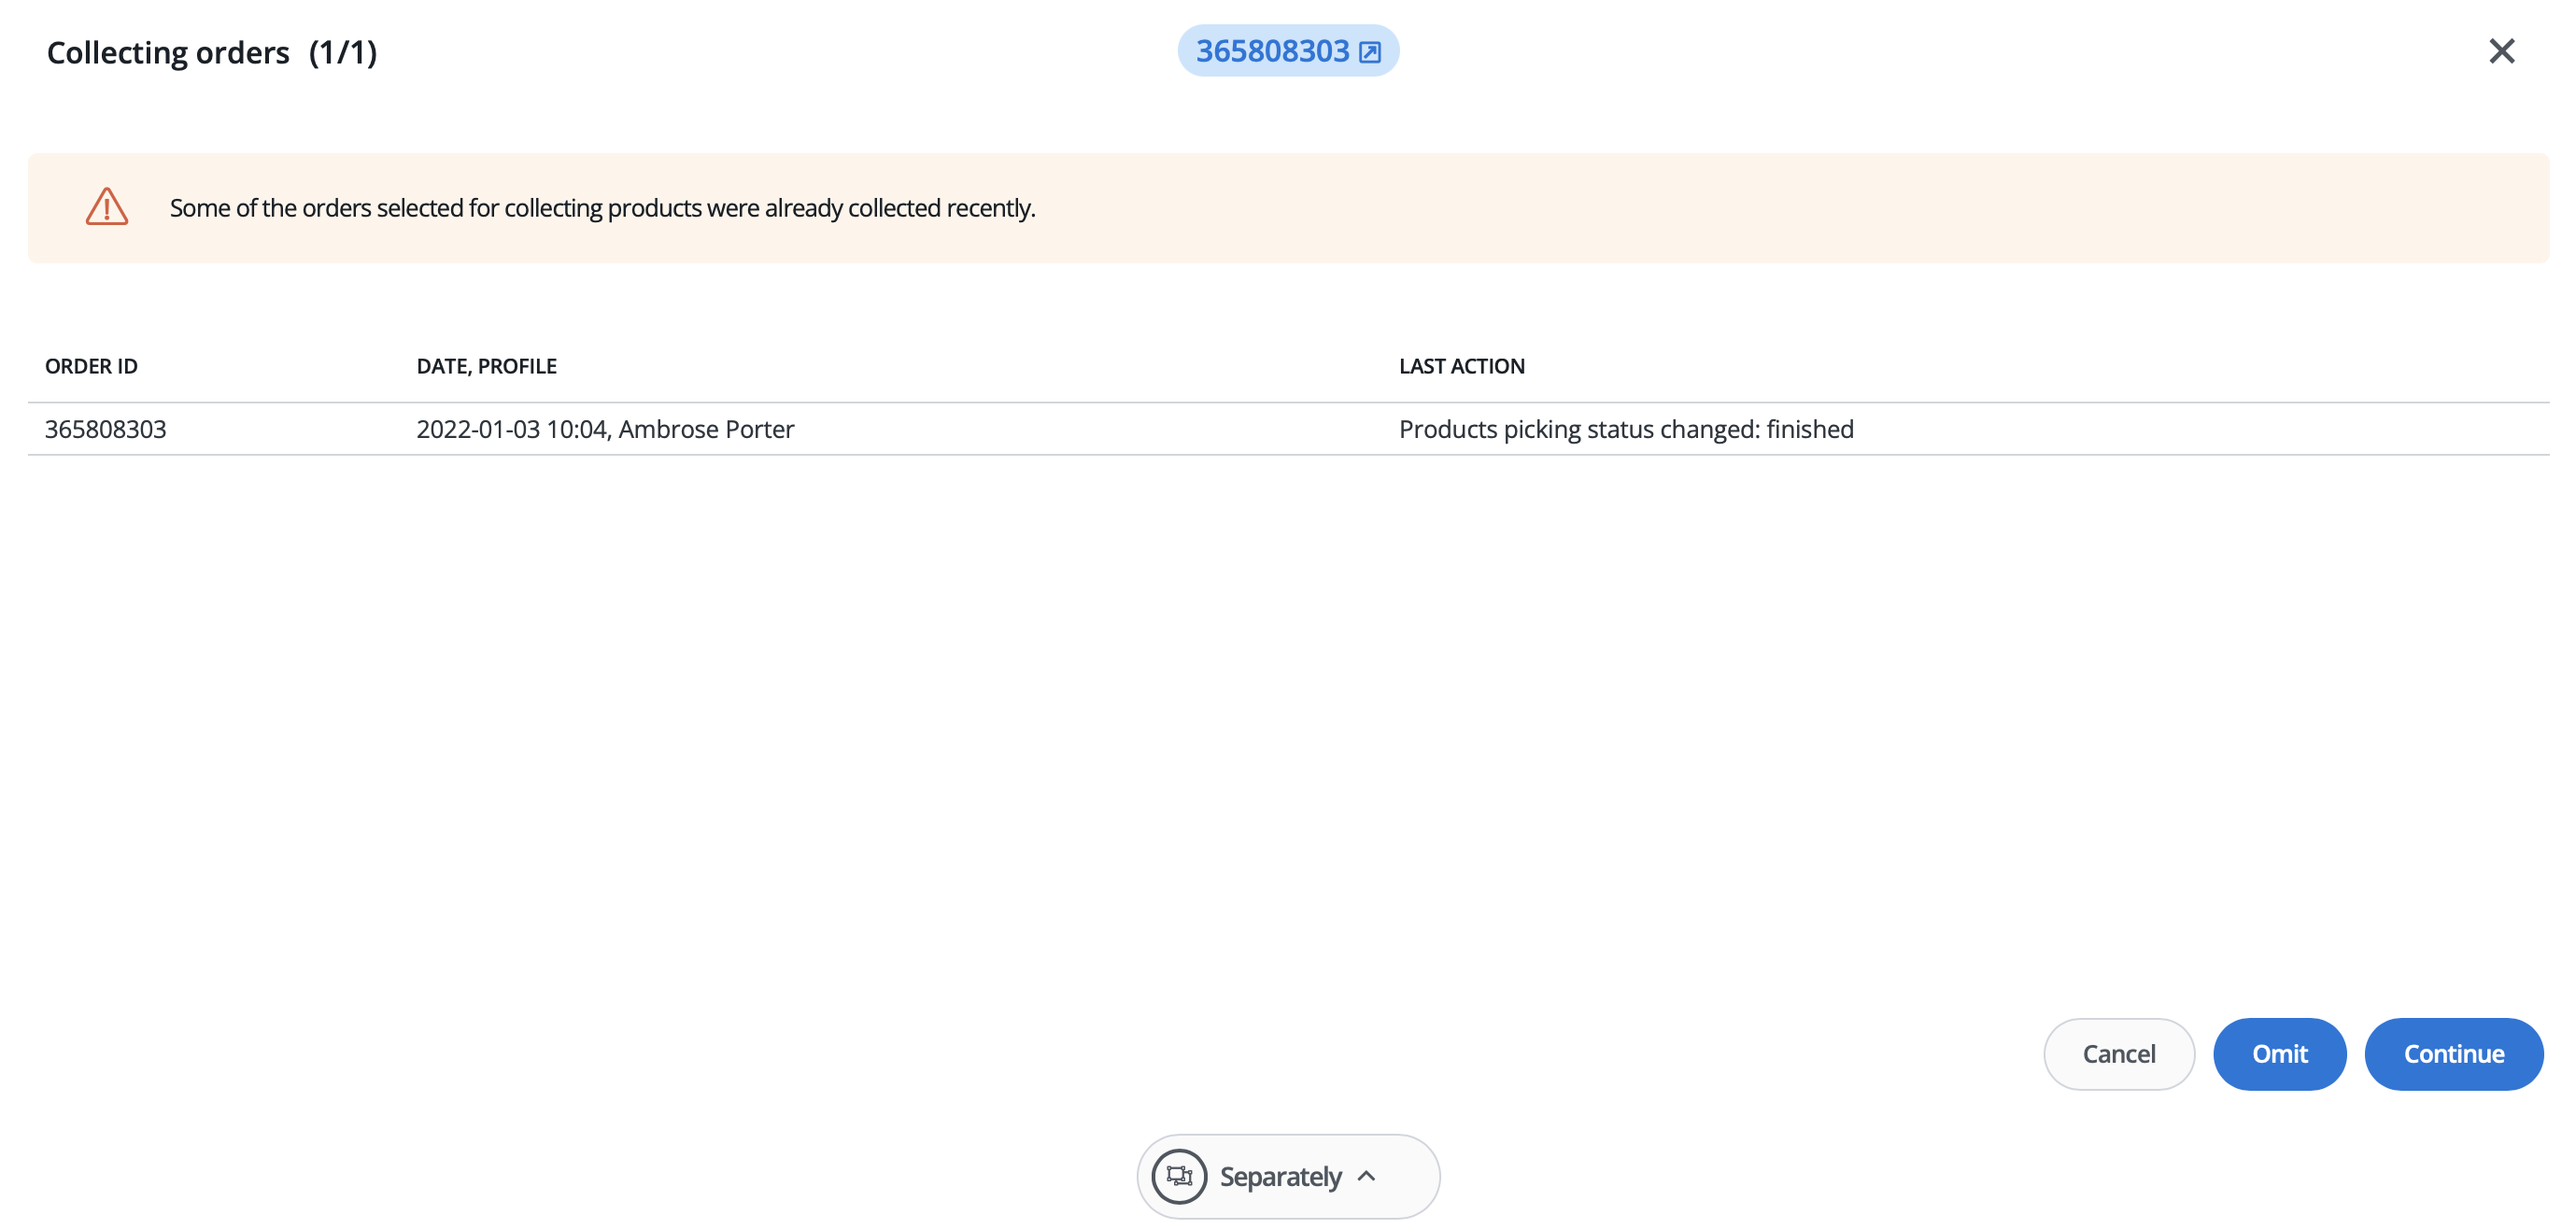
If another employee has already started to collect items for the same orders or if a given order has already been collected/packed, the system will notify you of such order status once you attempt to open the collecting view.
Adding products
The system is equipped in automated options allowing you to add products for collecting and packing. In order to do that, use the options available in the dropdown under the button PickPack Assistant in the order list.

Carts
The functionality of carts allows you to divide the products into specific orders during the completion process, by packing the items into separate carts or segments of the hand truck. This facilitates and speeds up the next step of order fulfillment, which is packing the orders for your customers.
In the system there are multiple carts to be set by assigning them particular names, colours and barcode. Orders → Settings → Picking/Packing → Carts.
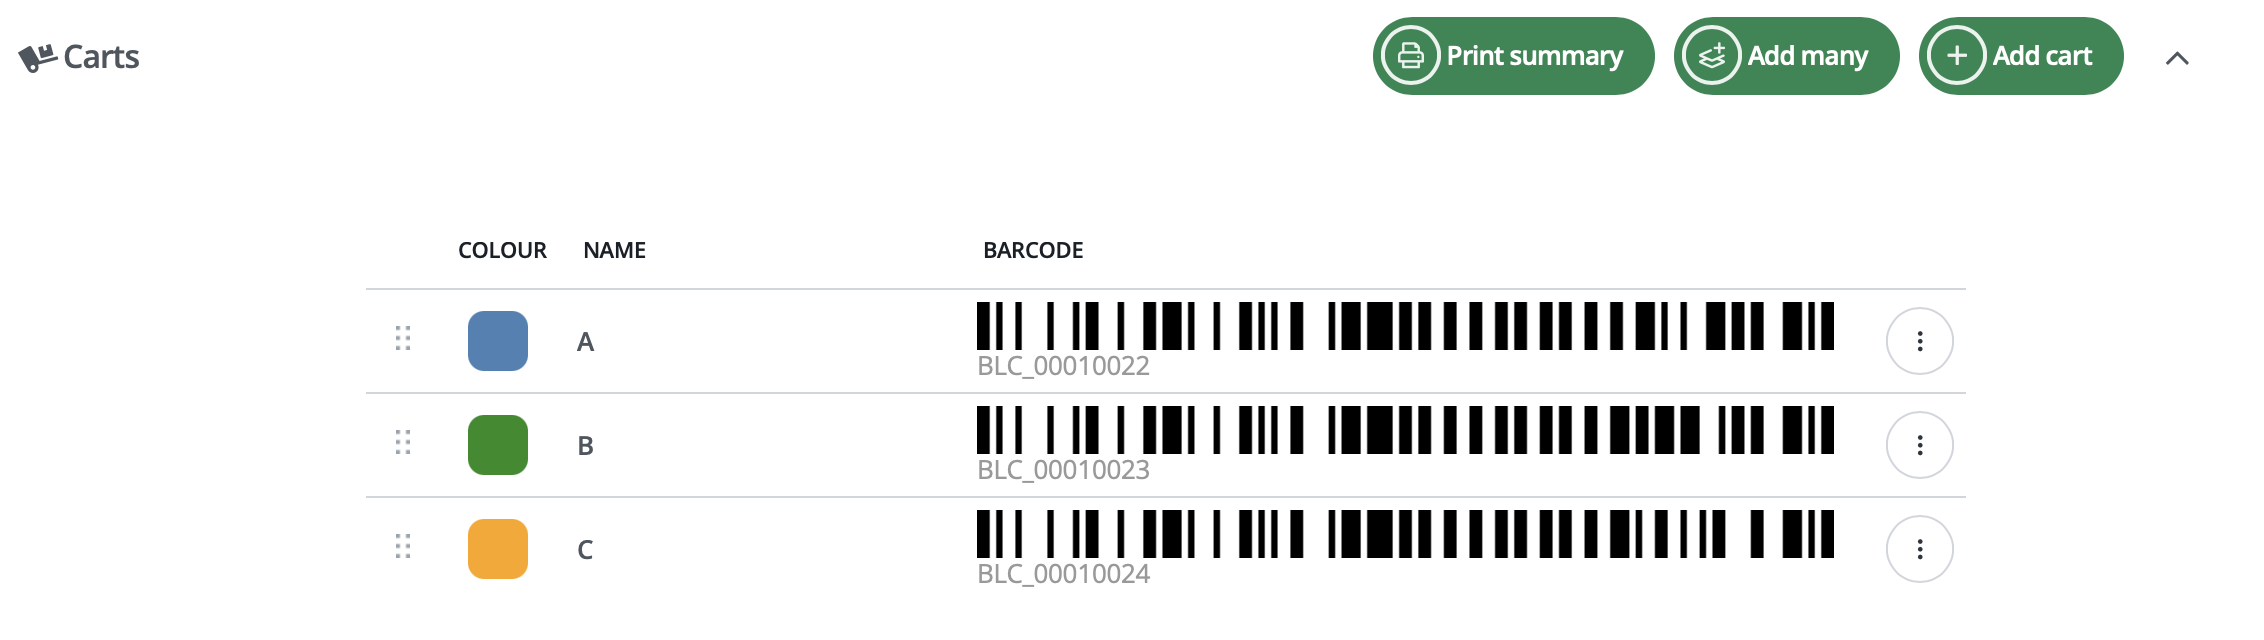
The barcode can be printed out and placed on a selected cart, hand truck or compartment and used while collecting items in the warehouse.
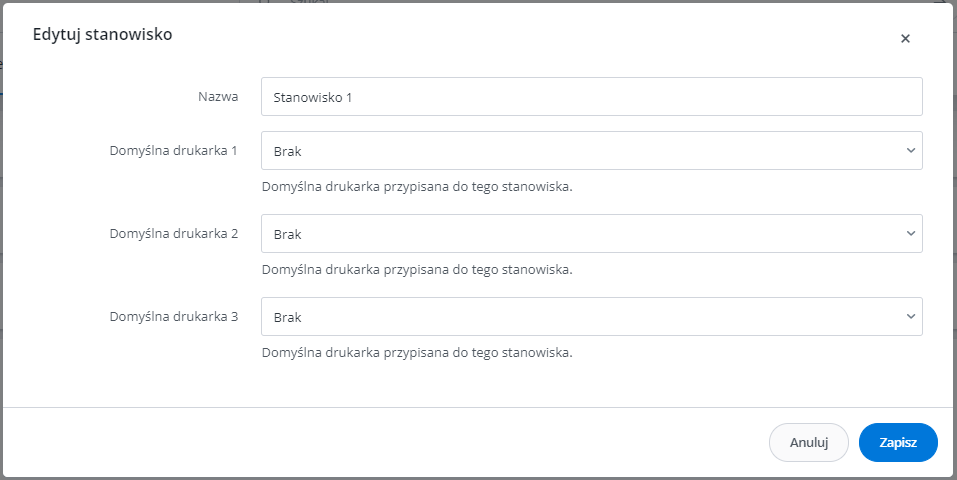
Workstations
The division of the warehouse area into packing workstations will allow you to organise the work of packing employees more efficiently as well as facilitate those processes. Each separate workstation you create can then be used as a condition while configuring an automated action.
In the tab Orders → Settings → Picking/Packing → Workstation settings, you can choose the default packing workstation and assign selected printers to it. You can also change them while packing the products in the packing view – the configuration will be always be retained for a specific device on which it has been set or edited.
After changing the workstation from the packing view, the change will also be applied in the Workstation settings.
Boxes
During the packing process, the system can automatically adjust the box with appropriate dimensions to the given order.
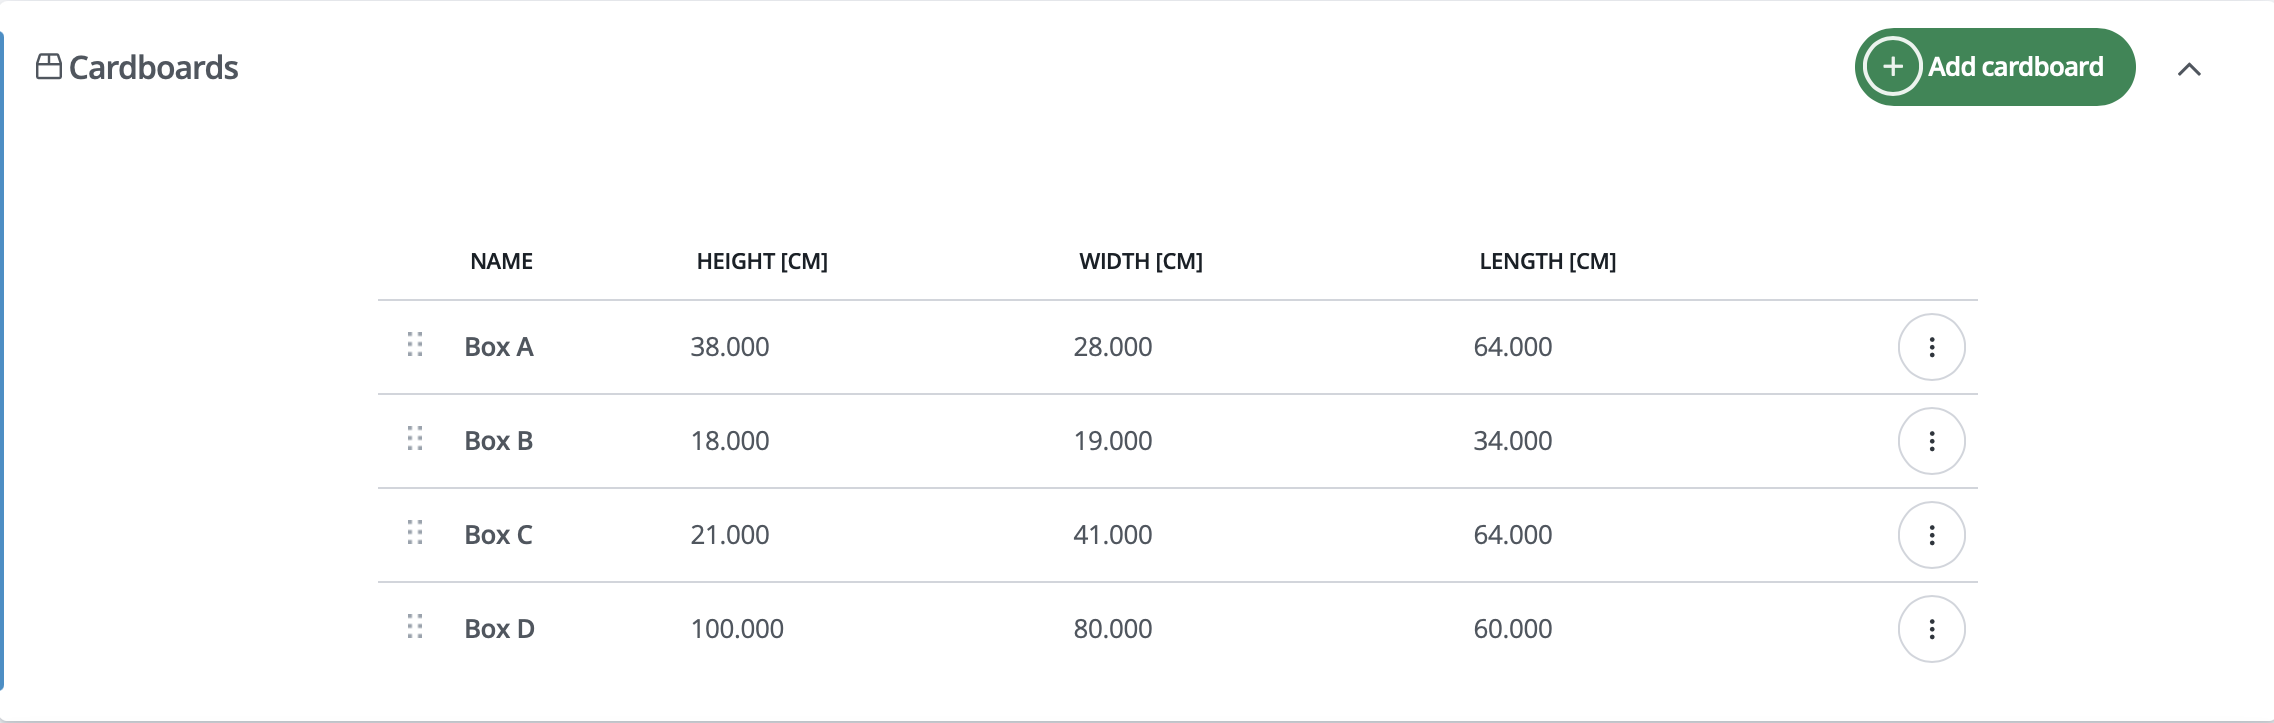
Depending on the dimensions of the boxes used in the company, you can create a list of them and adjust it to your needs in the tab Orders → Settings → Picking/Packing → Cardboards. Each position can be assigned its name, height, width and length.
While creating automatic actions, you can also use the conditions:
- Best fit cardboard
- Fits in cardboard
Those conditions can be used e.g. to move large-size orders to a different status, where they will be processed separately. You can also automatically generate a label with the selected size of the package, or assign the orders to specific packing workstations.
You can find out more about automatic actions in our dedicated article.
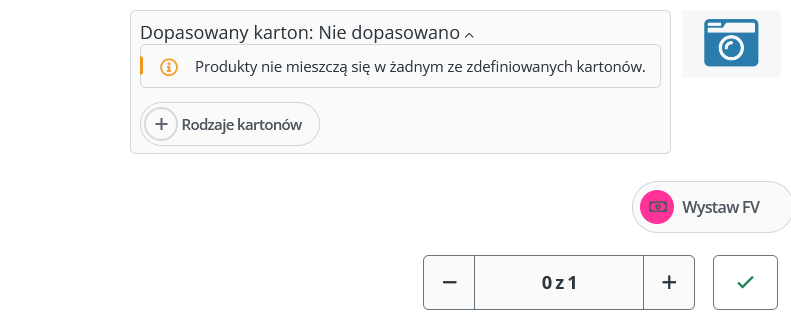
If you do not have predefined box sizes that correspond with the products in the packed order, the system will return an appropriate error message. You can then add new types of boxes directly from the packing view, or in the tab Orders → Settings → Picking/Packing → Cardboards.