The RMA system has been designed to provide high flexibility, as always. It applies in various cases:
- returns (when the customer sends back part or all of the order);
- complaints/exchanges (when the customer returns the goods, and the seller sends a different item);
- repairs (when the customer returns the item, it is processed and sent back to the customer).
List of returns
When you go to Orders ➝ Returns, you will see a list of returns. It is similar to the list of orders.
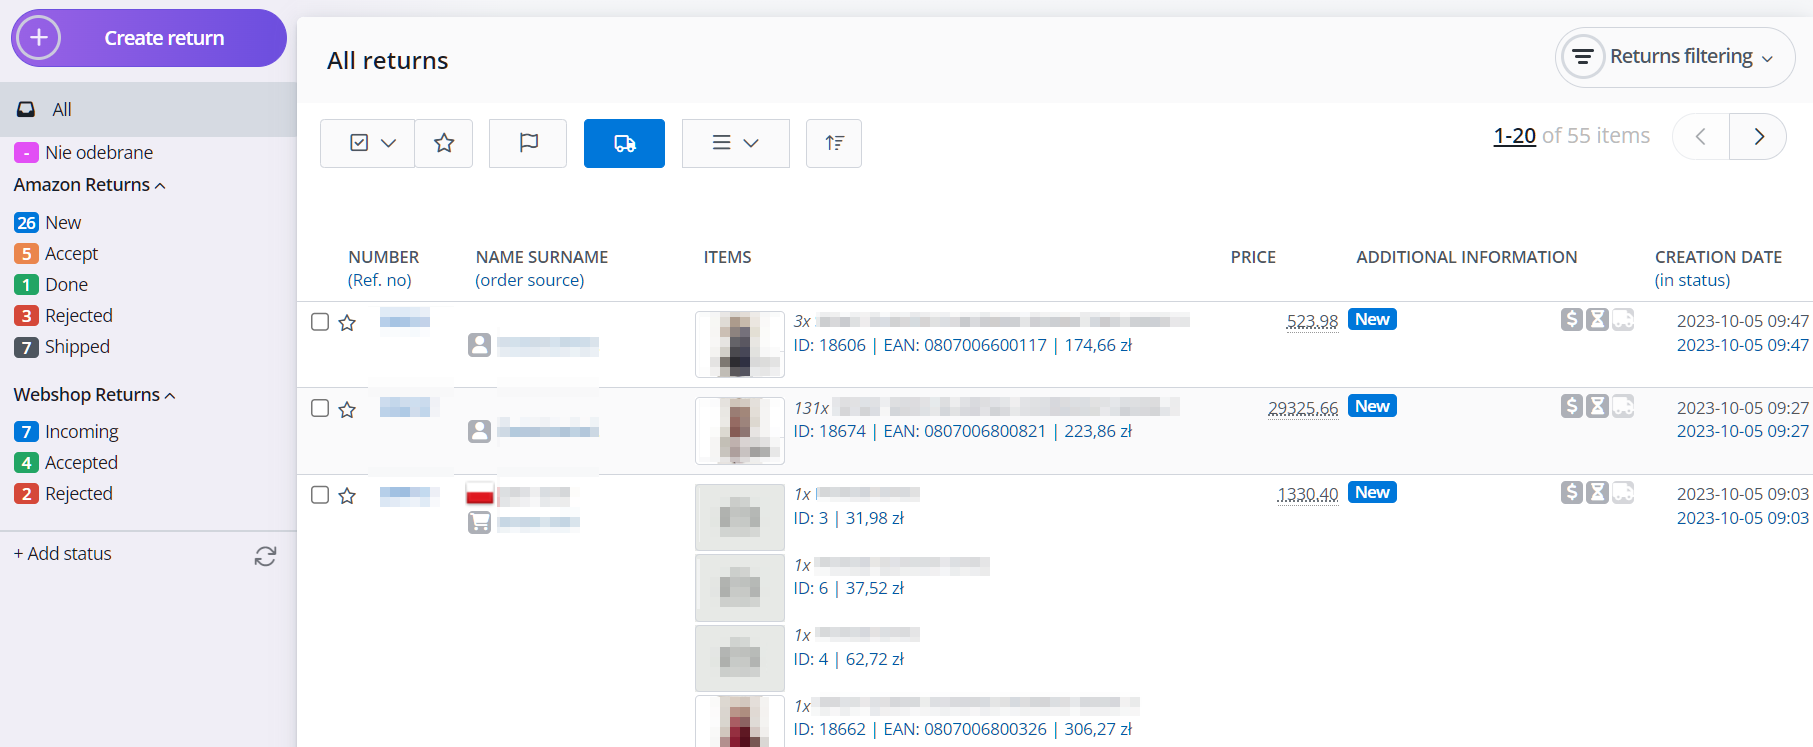
On the list of returns, you will see all returns created in the system. You can filter returns by their specific status.
For each return, you will find information such as:
- number and reference number (if applicable);
- first and last name of the buyer/returner;
- the source of the order to which the return pertains;
- items;
- refund amount;
- status;
- creation date;
- date moved to the current status.
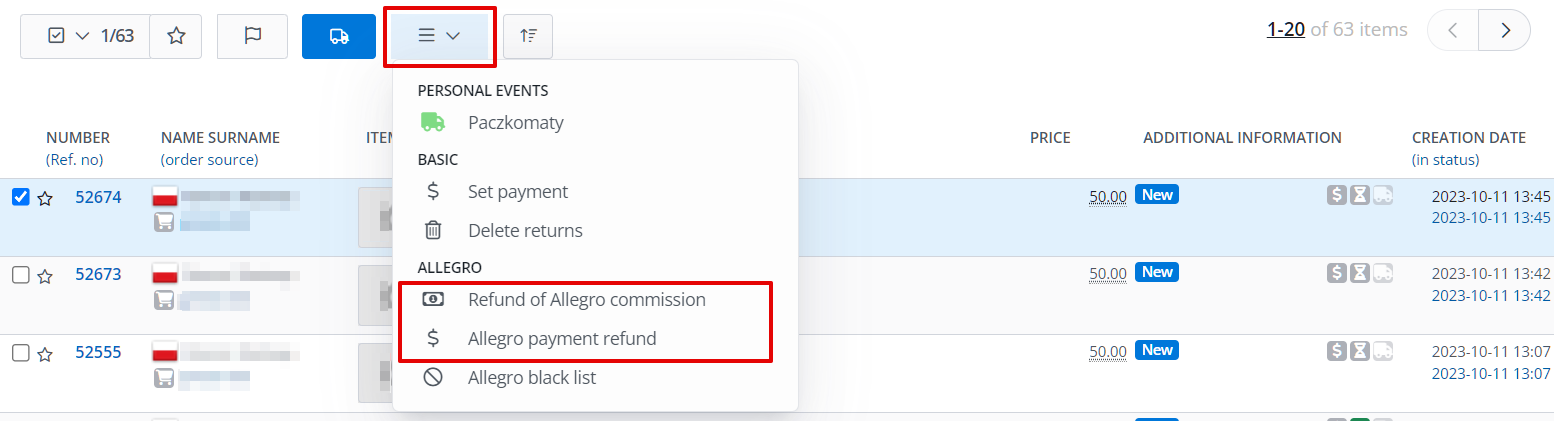
From the returns list, you can perform bulk actions such as changing the return statuses and creating labels for them. You can also perform actions such as:
- personal events;
- system actions (Set payment, Delete returns, and for orders from Allegro: Return of Allegro commission, Allegro payment refund, Allegro Blacklist).
You can filter and sort the returns list. Using the purple +Create Return button, you can add a new return.
Return card
The return card is similar to an order card. It also contains some information about the order related to the return (shipments, messages, sales documents, order history of automatic actions).
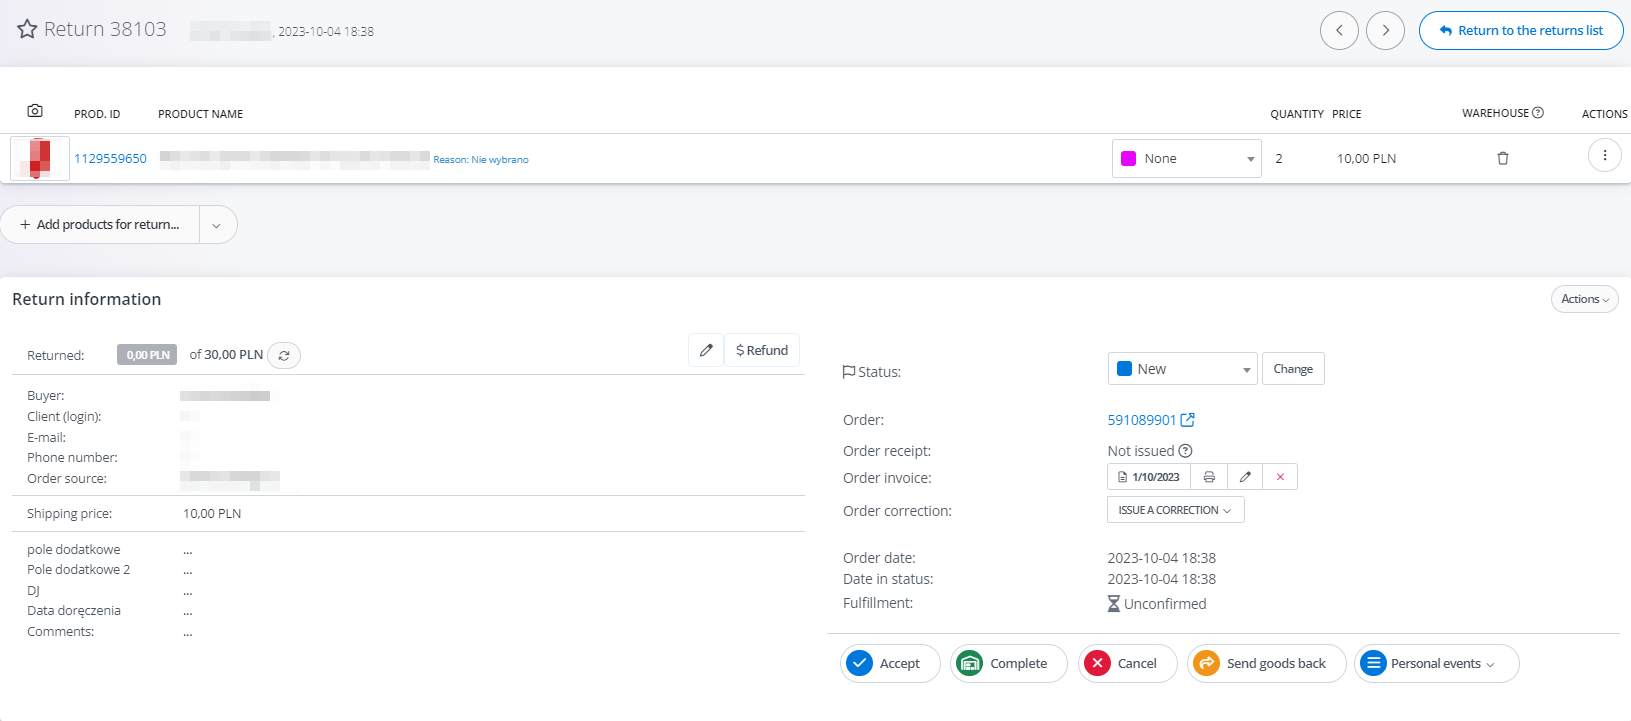
Product list
In the first part of the return card, below its number, the buyer’s first and last name, and the return creation date, you will find a list of products.
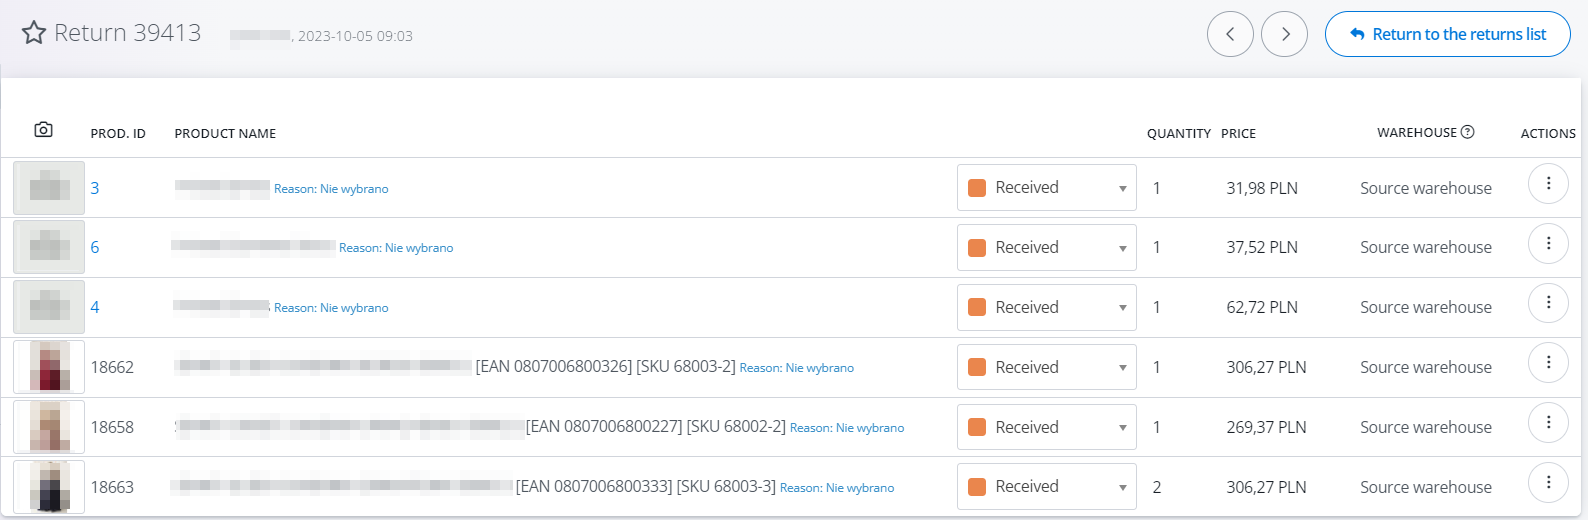
The list of products, in addition to the basic product details found on the order card, also includes the reason for the return, notes, status, and the warehouse to which the product will be returned.
You can set the return reason during product editing. In the same place, you can also change the quantity of the returned items.

Return Information
Below the list of products, you will find basic return information such as payment status, order source, buyer, return status, and the order number to which the return pertains (if available).
You will also see sales documents here, and you can issue an invoice correction.
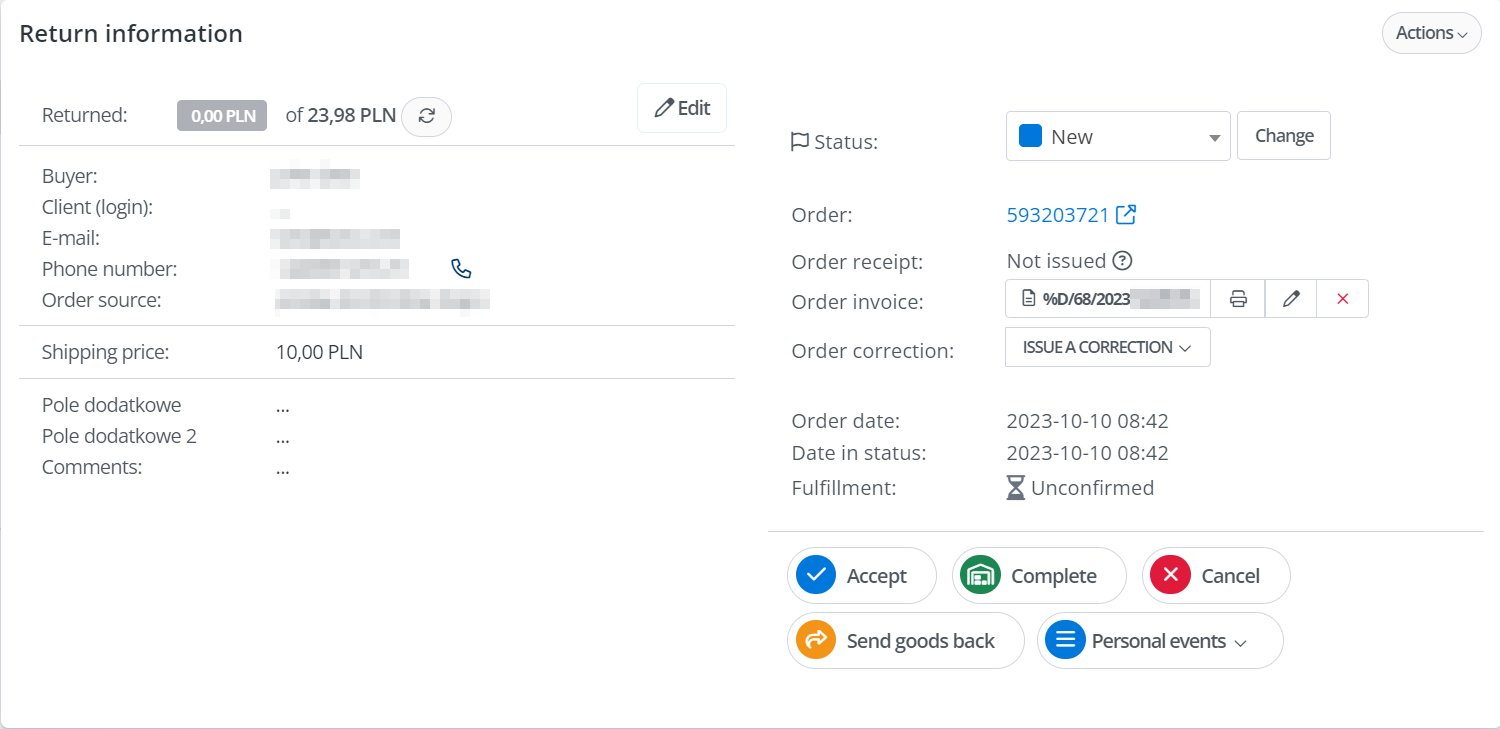
In the bottom right corner, you can see information about the return processing:
- Unconfirmed – the return is awaiting acceptance from the seller (Accept or Cancel);
- Accepted (waiting for fulfillment) – the return has been accepted (Accept) by the seller, waiting for the return shipment;
- Completed (stock restored) – the return has been received and positively reviewed (Complete), inventory levels have been restored;
- Rejected/cancelled – the return has been rejected (Cancel), products will not be restored to inventory.
In the case of product repair or replacement, you can use the Send goods back button.
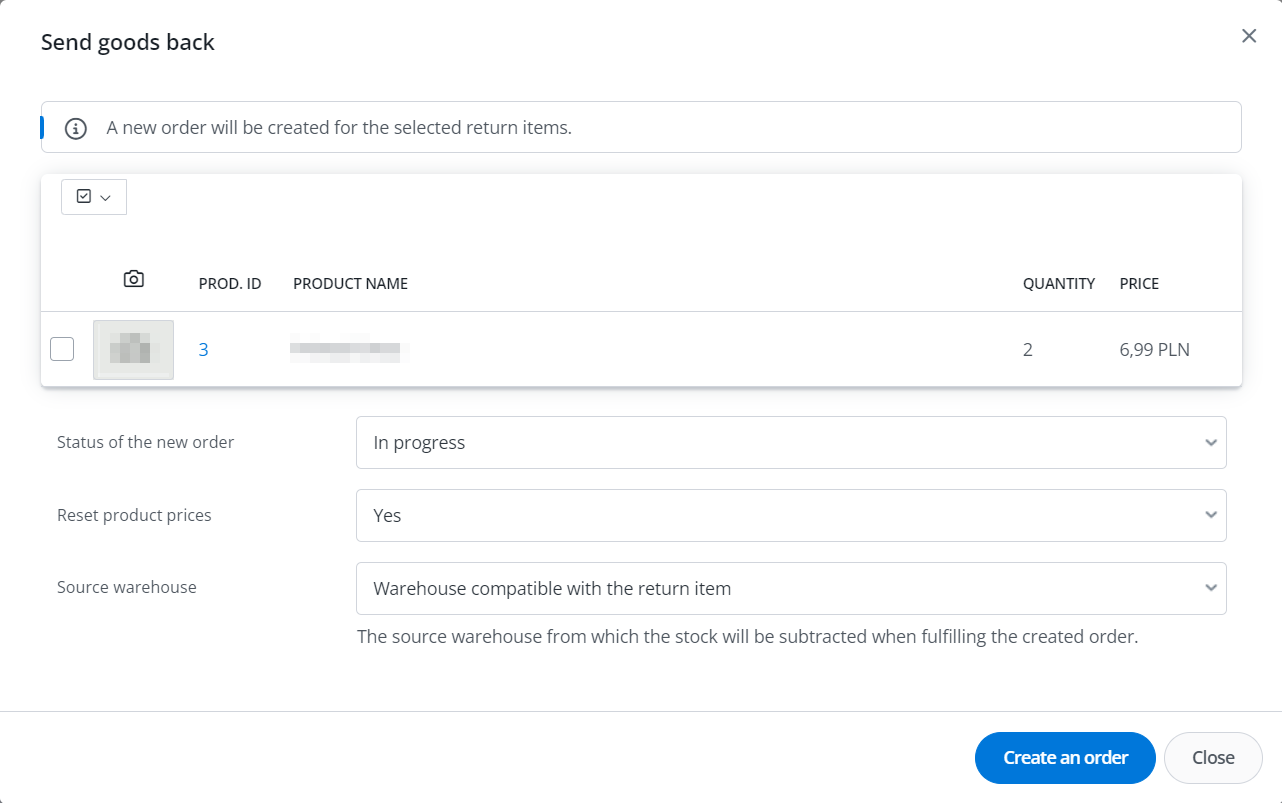
This option will create a new order with customer data from the return and the source set as Exchange upon return.
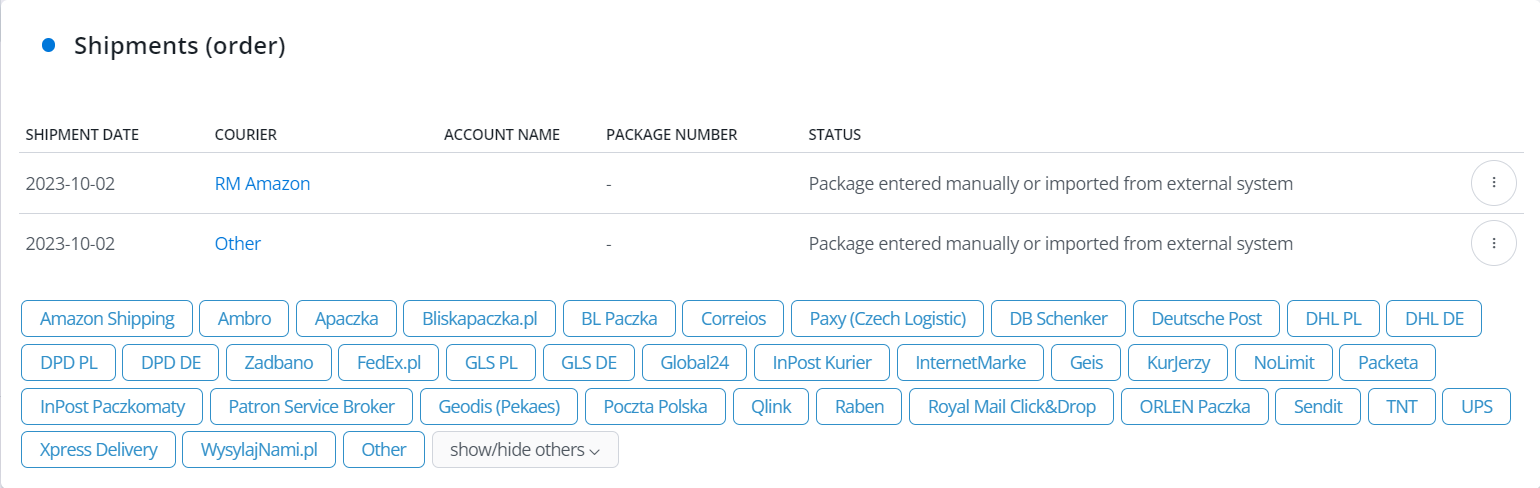
Shipments
The return includes the shipping numbers from the order to which the return pertains.
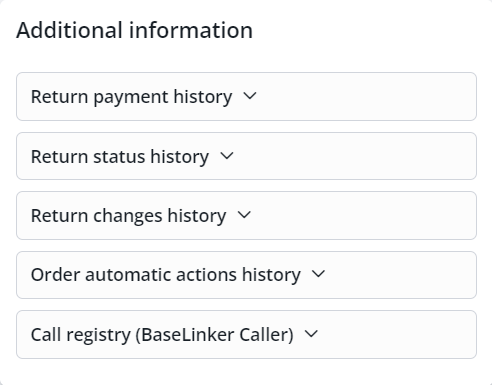
Additional information
In the case of a return retrieved from a marketplace, in the Additional Information section, similar to an order, you will find the transaction number related to the return and other data obtained from the platform (shipping method, payments, whether the order was SMART in the case of Allegro, etc.).
- The Return payment history contains information about manually set payment returns.
- The Return status history contains information about the status of the entire return.
- Changes in the return item statuses can be found in the Return changes history section.
- The Order automatic actions history includes both actions taken for the return and the history of automatic actions performed for the order.
Exchange of messages
If the return is associated with a customer and/or an order, in the Exchange of messages section, you can send a message to the returning party in the same way as from the order card.
This section will also include the message history and comments related to the associated order.
Return settings
You will find the return settings in the Orders ➝ Settings ➝ Returns section.
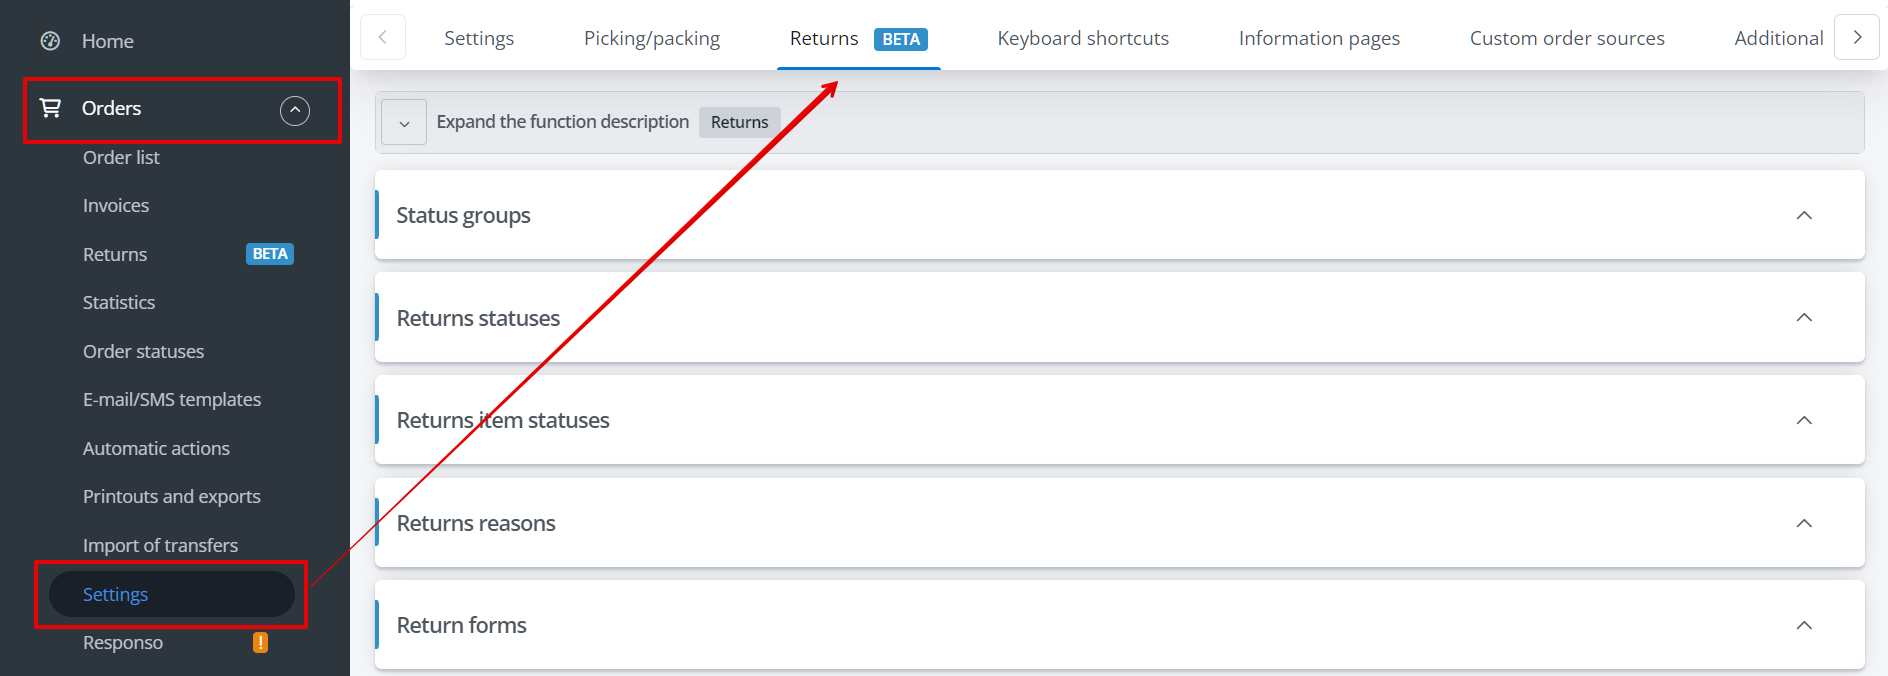
Status groups
You can assign return statuses, just like order statuses, to the appropriate groups to manage them more efficiently.
You can create a group of statuses in the Orders ➝ Settings ➝ Returns ➝ Status Groups ➝ +New Status Group section.
In the return settings, you can also delete a previously created group and change its name.
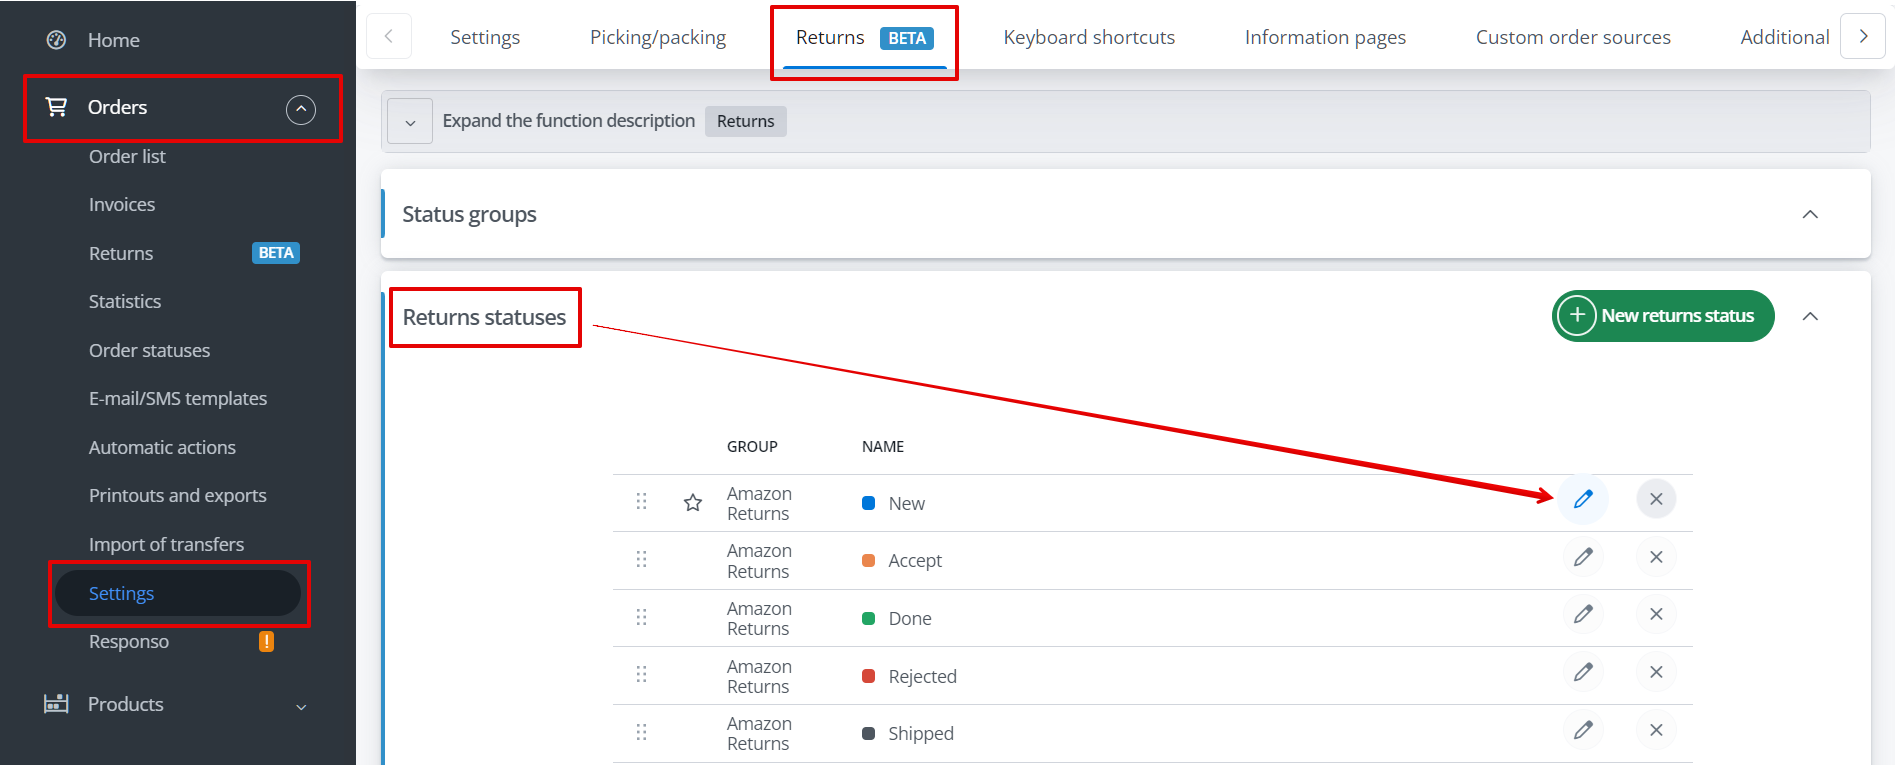
Returns statuses
You can add a new return status in the Orders ➝ Settings ➝ Returns ➝ Return Statuses ➝ +New Return Status section.
Each status can have its own color, name, and can be assigned to a selected group.
You can modify these details for an existing status from its edit options.
Returns item statuses
In the Orders ➝ Settings ➝ Returns ➝ Returns item statuses section, you can add and manage return statuses for individual items within a return.
Each status has its own color, name, and is assigned to a warehouse to which the item should be returned.
For already created statuses, you can modify this information at any time.
Returns reasons
In the Orders ➝ Settings ➝ Returns ➝ Returns reasons section, you can add and modify the reasons for return available in the system, based on which the buyer returned a particular product.
Each reason should have its own name and type:
- Refund,
- Replacement,
- Repair.
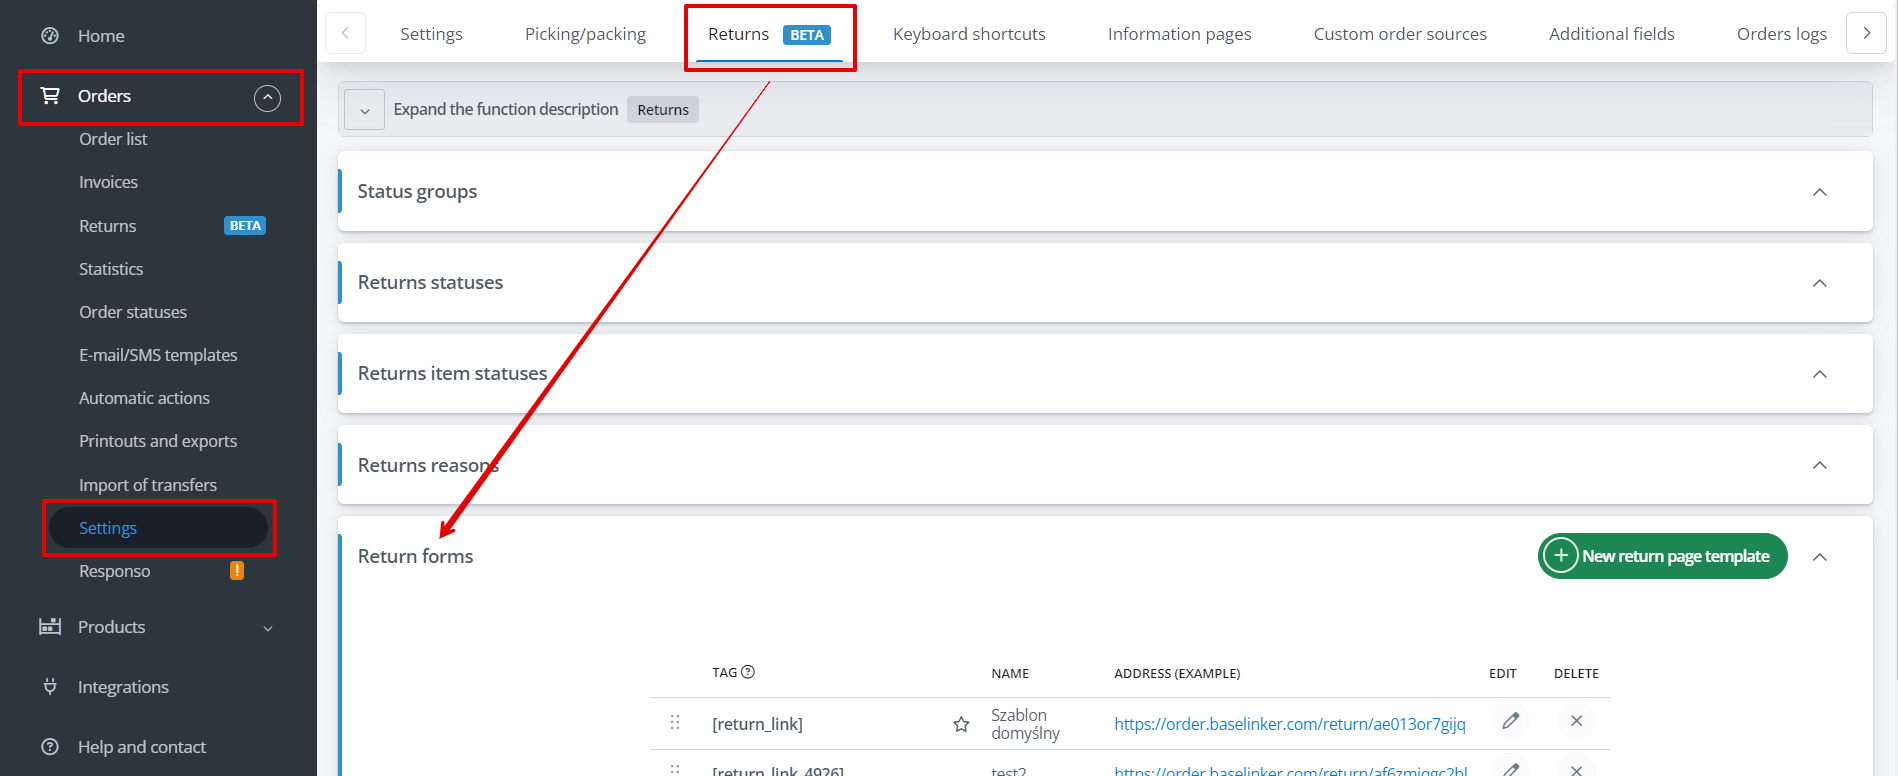
Return forms
In the Orders ➝ Settings ➝ Returns ➝ Return forms section, you can create and configure return submission pages for customers. This is also where you can find links to individual forms.
During the creation/editing of a return form, you need to configure:
- Auxiliary name;
- Order sources – choose which order sources the form should be available for;
- Time window – the number of days the form will be accessible (from the order date);
- Language of the return page;
- Products excluded from returns – specify products that are not eligible for returns, and they won’t be available on the return form;
- Header – text or an image;
- Link to FAQ – provide a link to your FAQ about returns;
- Link in the absence of an order ID – the page the user will be redirected to if they click on Don’t have an order number? on the login page of the return form;
- Link to ‘Ready’ button – the page to which the customer should be redirected after clicking Ready when submitting a return;
- Shipping status – choose whether a return can be reported at any stage of order fulfillment or only for orders with a shipping label already generated;
- Require seller confirmation;
- Return label – choose whether the return label should be available for download (if generated) or display return instructions (custom text);
- File format/Return instructions – depending on the option chosen above, you can select the label format for download or enter your custom text as return instructions.
Creating a return
You can create a return from the order card or the returns list.
Creating a return from the order card
On the order card, in the Order information section, select Actions ➝ Create return.
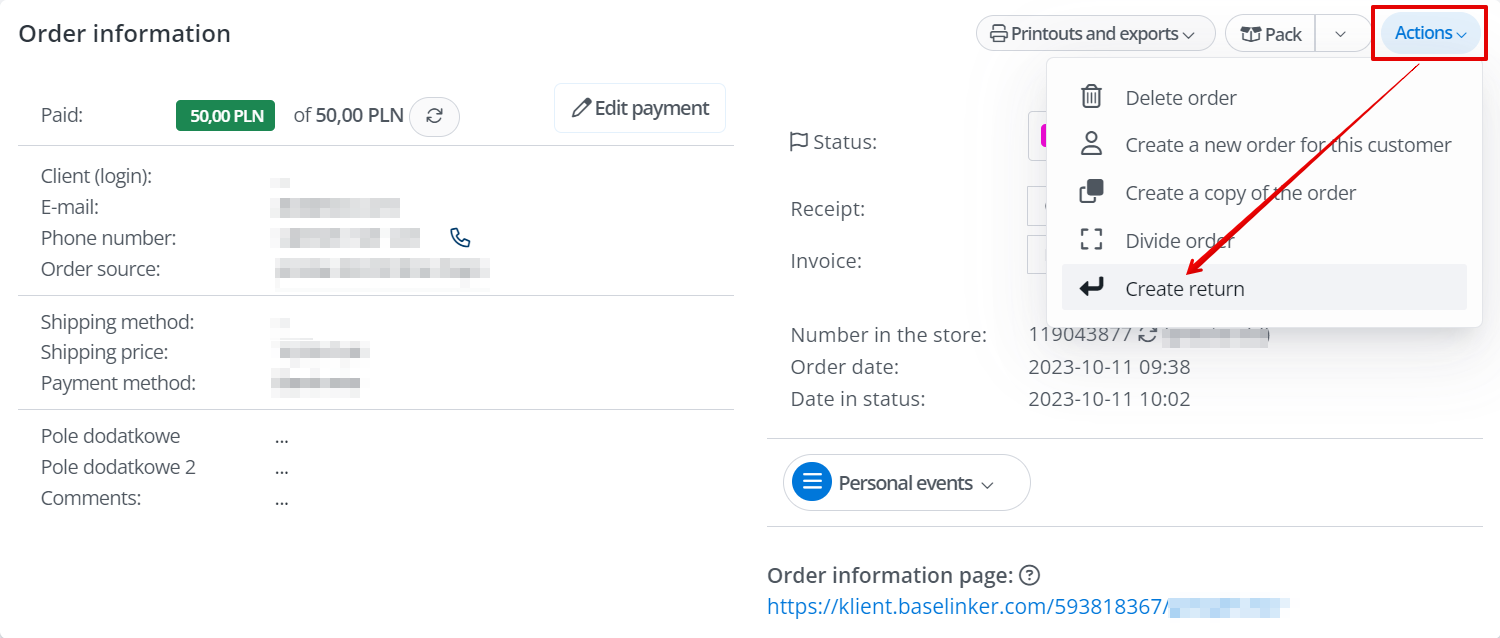
You will see the Send goods back window, where you should confirm your intent to create a return. You can also choose whether to include the cost of delivery in the return.
The next window is the Original order items, where you can select which products should be included in the return.

Creating a return from the return list
You can also add a new return in the Orders section ➝ Returns ➝ +Create Return.
You can create a return in three ways:
- independent return;
- for an available order;
- customer-related return.
Automatic actions
Currently, there are 7 return-related events available in the system:
- A return has been created for the order;
- Order return status changed – as a condition, you can choose the status after which automation should be triggered;
- Return accepted;
- Return completed;
- Return rejected;
- Order payment has been refunded;
- Invalid order payment has been refunded.
Actions directly related to returns include:
- Create return – for orders that meet the selected conditions, a return will be created containing all the order items;
- Change return status – you should choose the status that the automation will set;
- Modify return – choose the field you want to change in the return and specify its value;
- Accept the return;
- Complete the return;
- Cancel the return;
- Allegro comission refund (for the return positions);
- Allegro payment refund (for the refund positions).
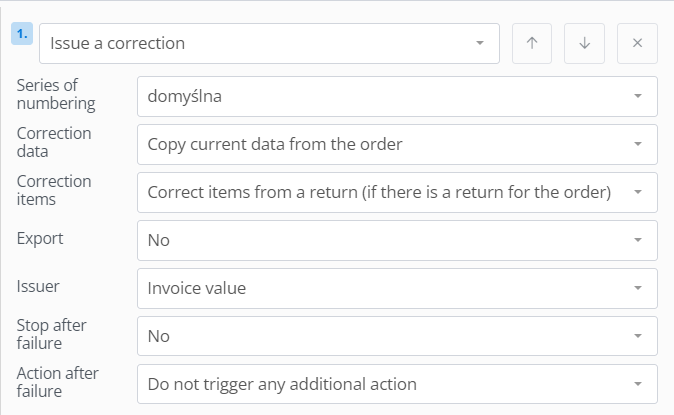
Based on data from the return, you can also automatically create invoice corrections.
Allegro returns
In the Allegro integration settings (Integrations ➝ Allegro account ➝ Returns), you can enable the retrieval of returns into the system. You can choose a time range to specify how far back in time to retrieve returns.
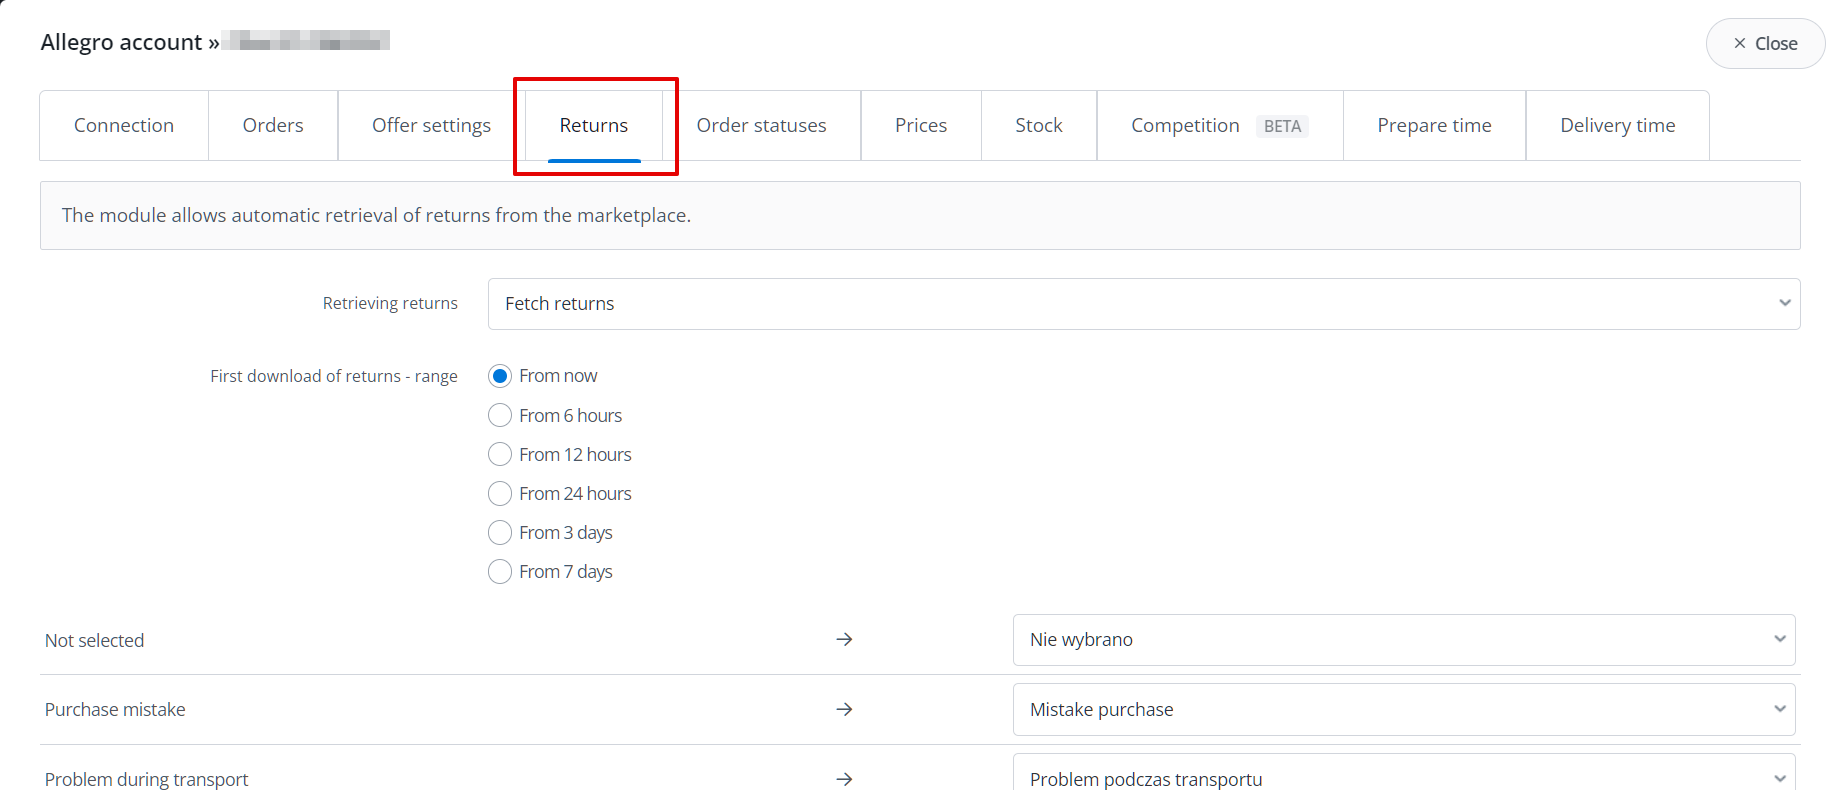
In this section, you can also map Allegro return statuses to the statuses available in the system.
A return retrieved from Allegro has a system number as well as a reference number from Allegro (reference number).
You can also directly process refunds for transactions on Allegro and request a refund of commissions for orders directly from BaseLinker. You can do this from the order list or return list by selecting the appropriate action. You can also use the previously mentioned automatic actions for this purpose.
The return shipping number is retrieved from Allegro and can be found in the Shipments section.